How to Keep Makeup Intact for Photos: Camera-Ready Tips That Last
Makeup that looks perfect in the mirror can look very different in photos, and it is often not obvious until you see the pictures afterwards. Cameras pick up shine, uneven patches and flashback, and long events such as weddings, parties or professional shoots give makeup plenty of time to fade or slide.
Part of our guide to makeup how-to. Start with: What Can You Use to Make Your Makeup Stay On All Day? 9 Products and Tricks
To keep makeup intact for photos, start with well-prepped, hydrated skin, use a primer suited to your skin type and choose long-wear, transfer-resistant formulas applied in thin layers. Set the T-zone with a light layer of powder, avoiding heavy white powders that cause flashback in flash photos, and finish with a setting spray. Add a little more colour than usual to blush, brows and lips, since cameras wash out colour. During the event, blot shine rather than adding powder, carry a small touch-up kit and check your makeup in a quick test photo in the same lighting.
The goal is makeup that looks natural in person and still reads well on camera, without shine, patches or white casts. A few adjustments to your usual routine are usually enough, and most of them are simple to add on the day.
Blotting papers are one of the most useful tools for photos. The American Academy of Dermatology recommends them for oily skin because they lift oil without adding more product.
This guide covers prep, product choices, flash photography, colour intensity and touch-ups for long days in front of the camera, plus tips for different types of events.
Shopping these picks?
Amazon Prime members get fast, free shipping on eligible items, plus Prime Video, Amazon Music and member deals. New members can start with a free trial.
Start a free Prime trialAged 18 to 24? Prime for Young Adults comes with a longer free trial and a lower price after it.
Affiliate link: we may earn a commission at no extra cost to you.
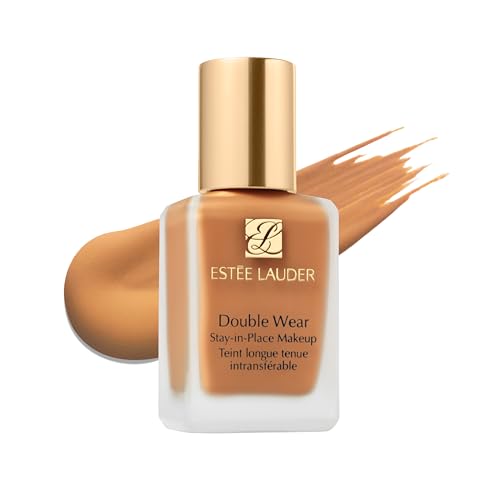
Recommended Products for Photo-Ready Makeup



Quick Answer
- Hydrated, prepped skin photographs more smoothly.
- Long-wear, thin layers last longer than heavy coverage.
- Avoid heavy white powders that cause flashback.
- Cameras wash out colour, so add a little more.
- Setting spray melts layers and extends wear.
- Blot shine instead of adding more powder.
- Take a test photo in the event lighting.
In This Guide
- Why Makeup Looks Different in Photos
- Prep for Long-Lasting, Camera-Ready Makeup
- How to Make Makeup Camera-Ready and Long-Lasting
- Avoiding Flashback
- Adding the Right Amount of Colour
- Choosing Long-Wear Formulas
- Touching Up During a Long Event
- Lighting and Angles
- Adjusting for Different Types of Photos
- Dos and Don’ts
- Honest Limits
- When to See a Dermatologist
- Questions People Ask
- The Takeaway
Why Makeup Looks Different in Photos
| Camera effect | What happens | How to prevent it |
|---|---|---|
| Shine | Oil reflects light and looks greasy | Mattify the T-zone; blot before photos |
| Flashback | White powders or SPF reflect flash | Use tinted or flashback-tested powder; avoid heavy mineral SPF on the face |
| Washed-out colour | Flash and bright light flatten features | Add a bit more blush, brow and lip colour |
| Texture | Harsh light shows pores and bumps | Thin layers; soft-focus products |
| Patchiness | Uneven foundation shows more clearly | Blend well, especially at the jaw and hairline |
| Shade mismatch | Face looks lighter or darker than neck | Match foundation to the neck in daylight |
High-resolution phone and professional cameras show far more detail than most people notice in a mirror. Taking a quick test photo before an event is the easiest way to see what the camera sees. Look at the photo at full size on your screen, not just as a small thumbnail, to spot patches or shine.
Prep for Long-Lasting, Camera-Ready Makeup
- Cleanse and moisturise; hydrated skin looks smoother on camera.
- Use lightweight skincare on oily areas so makeup does not slide.
- Apply sunscreen early and let it set fully before makeup.
- Exfoliate gently a day or two before, not on the day, to avoid irritation.
A good night’s sleep, drinking enough water and avoiding very salty food the night before can also reduce puffiness around the eyes, which cameras tend to exaggerate. If the event is outdoors, choose a sunscreen that does not leave a white cast in photos. Our guide on physical versus chemical SPF explains which filters are more likely to cause flashback.
How to Make Makeup Camera-Ready and Long-Lasting
Prime strategically
Use a pore-filling or mattifying primer on the T-zone and hydrating primer on dry areas.
Apply thin, long-wear layers
Build foundation only where needed with a damp sponge.
Conceal and set
Set concealer lightly with a finely milled, tinted or translucent powder.
Add colour
Apply slightly more blush, bronzer and brow product than usual.
Choose long-wear eyes and lips
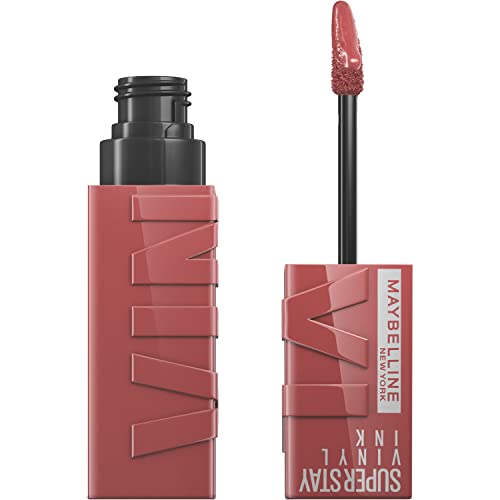
Use waterproof mascara, long-wear liner and transfer-resistant lip colour.
Set with spray
Mist a setting spray to lock everything in.
Take a test photo
Check with flash and without, in similar lighting to the event.
Take your test photo with the flash on. It is the quickest way to spot flashback from powder or sunscreen before it appears in every photo of the day.
Avoiding Flashback
Flashback is the white cast that appears on the face in flash photos. It is usually caused by highly reflective white powders, such as some silica-based setting powders, or by mineral sunscreens and SPF makeup containing titanium dioxide or zinc oxide.
To avoid it, use a tinted powder or one that has been tested for flash, press powder in thinly rather than baking, and avoid heavy SPF foundation or powder on the face for flash photography. Under-eye areas are especially prone to flashback because people often use the most powder there, so keep setting light in that area. Our guide on the soft-focus effect in makeup explains why some blurring powders reflect flash.
You do not have to skip sunscreen for photos. Apply it early, let it absorb and choose a formula without a strong white cast, then test with flash.
Adding the Right Amount of Colour
Cameras, especially with flash and bright lighting, flatten the face and wash out colour. Makeup that looks natural in person can almost disappear in photos. The aim is to add definition without looking heavy in person, so build gradually and check both in the mirror and on camera.
- Use a little more blush and bronzer than usual, blended well.
- Define brows slightly more so they frame the face.
- Choose a lip colour one shade deeper than your everyday choice.
- Add mascara to both upper and lower lashes if you like, and curl lashes first.
- Keep shimmer subtle; very glittery products can look like shine.
If you want to add dimension to the face, our guide on how to fix patchy contour covers blending contour smoothly so it looks natural in close-ups.
Choosing Long-Wear Formulas
Foundation: long-wear or transfer-resistant foundations with a soft-matte or satin finish last through long events. Apply thinly to avoid a mask-like look. Very dewy foundations can read as shine on camera, while very flat mattes can look lifeless, so a middle ground usually photographs best. Concealer: long-wear concealers crease less but can look dry; use a thin layer. A colour corrector under concealer can reduce how much coverage you need for dark circles, which keeps the under-eyes lighter and less likely to crease. Eyes: waterproof or tubing mascara and long-wear liner survive emotional moments and warm rooms. Our guide on fixing smudged eyeliner covers liner that stays put. Lips: liquid lipsticks and stains resist eating and drinking better than glosses. Line lips first to prevent feathering. If you love gloss, wear a stain or liquid lipstick underneath and add a touch of gloss only in the centre of the lips before key photos. Setting spray: long-wear or matte setting sprays form a light film that helps everything stay in place. Hold the bottle at arm’s length and mist in an X and T pattern for even coverage.Touching Up During a Long Event
Even long-wear makeup benefits from small touch-ups over several hours. Checking your makeup every couple of hours, or before important photos, keeps small problems from becoming obvious ones.
- Blotting papers for shine.
- A small compact of tinted or translucent powder.
- Concealer for any spots that wear away.
- Your lip colour and a lip liner.
- Cotton buds for smudges around the eyes.
- A mini setting spray.
Always blot before adding powder. Powder over oil builds up and can look cakey in close-up photos. If your skin gets shiny quickly, a quick blot every hour or so is better than one heavy touch-up later. The AAD’s advice on oily skin also recommends blotting papers to control shine during the day. Our guide on makeup hacks for an oily T-zone covers shine control in more detail.
Avoid applying fresh loose powder immediately before flash photos. A light blot is usually enough and reduces the risk of flashback.
Lighting and Angles
Soft, diffused light, such as window light or shade outdoors, is the most flattering. Harsh overhead light casts shadows under the eyes and highlights texture. Direct midday sun is the least flattering, creating strong shadows and making people squint.
Facing the light source directly reduces shadows and evens out skin tone, which means you need less concealer and powder to look even. Turning slightly to your preferred side can also help. Our guide on makeup for asymmetrical features discusses finding your best angle.
If you are doing your own makeup for a photo event, do it in lighting as close as possible to where the photos will be taken, or at least check it in daylight. Warm indoor bulbs can make makeup look softer and more blended than it really is.
Adjusting for Different Types of Photos
| Occasion | Main challenge | Key adjustments |
|---|---|---|
| Weddings and long events | Hours of wear, emotion, warm rooms | Long-wear base, waterproof mascara, touch-up kit |
| Professional headshots | Close-up detail, studio lighting | Thin, well-blended base; defined brows; matte T-zone |
| Outdoor daytime photos | Sun, heat and sweat | Water-resistant formulas, blotting papers, sunscreen without white cast |
| Evening parties with flash | Flashback and shine | Tinted powder, no heavy SPF makeup, blot before photos |
| Video calls and filming | Continuous light and movement | Satin finish, soft definition, avoid heavy shimmer |
Close-up photography shows the most detail, so blending at the jaw, hairline and around the nose matters more than coverage. For group photos taken from further away, a little extra colour on the cheeks and lips helps your features stand out.
For events where you will cry, laugh or hug a lot, waterproof mascara, a long-wear base and a lip stain or liquid lipstick are the safest choices. Keeping cotton buds in your bag makes it easy to tidy the under-eyes between photos.
Dos and Don’ts
Helps
- Prep and hydrate skin
- Use long-wear, thin layers
- Add a little more colour
- Take a test photo with flash
- Blot before touching up
Backfires
- Bake heavy white powder under the eyes
- Wear lots of SPF makeup for flash photos
- Pile on powder over shine
- Use very glittery highlighter
- Skip lip liner
Honest Limits
No makeup lasts perfectly through a very long, hot or emotional day. Small touch-ups are normal and expected, and even professional shoots include regular checks and touch-ups between shots.
Camera quality, lighting and editing all change how makeup looks, so the same makeup can look different in different photos.
Professional makeup artists often use techniques and products tailored to specific cameras and lighting. For a very important event, a trial run with your photographer or makeup artist is worth considering. It lets you see how products photograph and adjust anything you are unsure about well before the day.
When to See a Dermatologist
- You break out or react after wearing long-wear makeup.
- Your skin is very oily or dry despite a good routine.
- You want to treat texture, scarring or pigmentation before a big event.
- Makeup causes redness, itching or stinging.
This article is for general information and does not replace professional medical advice. See a dermatologist for persistent skin concerns, ideally well before a major event.
Questions People Ask
How do I make my makeup last for photos?
Prep well, use long-wear thin layers, set lightly and use a setting spray.
What causes white face in flash photos?
Flashback from reflective white powders or mineral SPF.
Should I wear more makeup for photos?
A little more colour on cheeks, brows and lips helps; keep the base thin.
How do I stop looking shiny in photos?
Mattify the T-zone and blot just before photos.
Is SPF makeup bad for photos?
Heavy mineral SPF can cause flashback; test with flash first.
What mascara is best for events?
Waterproof or tubing mascara.
Which lipstick lasts longest for photos?
Liquid lipsticks and stains, with lip liner.
Should I bake my makeup for photos?
Baking with white powder can cause flashback; use a light, tinted set instead.
What should I carry for touch-ups?
Blotting papers, powder, concealer, lip colour and cotton buds.
How can I check my makeup before an event?
Take a test photo with and without flash in similar lighting.
The Takeaway
Makeup stays intact for photos when you prep well, use thin long-wear layers, set lightly and finish with a setting spray. Avoid heavy white powders and strong mineral SPF on the face for flash photos, and add a little more colour than usual.
Take a test photo before the event, blot shine instead of adding powder and carry a small touch-up kit. With those habits, your makeup can look fresh from the first photo to the last.

Written by
Registered pharmacist and founder of Facial Adviser. Rakib's pharmacy training covers how skincare actives work and interact; a later course in cosmetology turned that into a focus on facial treatments and skincare products. He plans, researches and edits every guide on the site and checks health claims against sources such as the American Academy of Dermatology, the FDA and the NIH. He is not a dermatologist; see the Editorial Policy and Medical Disclaimer.
About · Editorial policy · How we choose products · Medical disclaimer · Contact
Keep reading: Making makeup last
- What Can You Use to Make Your Makeup Stay On All Day? 9 Products and Tricks
- Makeup for Enlarged Pores: How to Blur Them Without Clogging Skin
- Best Setting Techniques for Longevity: Powder, Spray and Layering Tips
- Makeup Fixer vs Setting Spray: What Is the Difference and Which Do You Need?
- Why Does Makeup Separate on My Nose? Causes and Fixes That Work
- Best Way to Wear Makeup in Hot Weather: Light Layers That Last
- How to Find the Right Shade of Makeup: Undertone, Depth and Testing
- How to Choose the Right Eye Makeup Color for Your Eyes and Skin