Best Way to Dry Makeup Brushes: Flat, Angled Down and Never Upright
Washing makeup brushes is only half the job. How you dry them decides whether they stay soft and shaped for years or start shedding, splaying and smelling musty within months. Most damage comes from a few easy-to-fix habits, such as standing wet brushes upright in a cup.
Part of our guide to makeup tools. Start with: 10 Best Makeup Brush Sets (2026): Soft, Well-Made Kits for Every Look
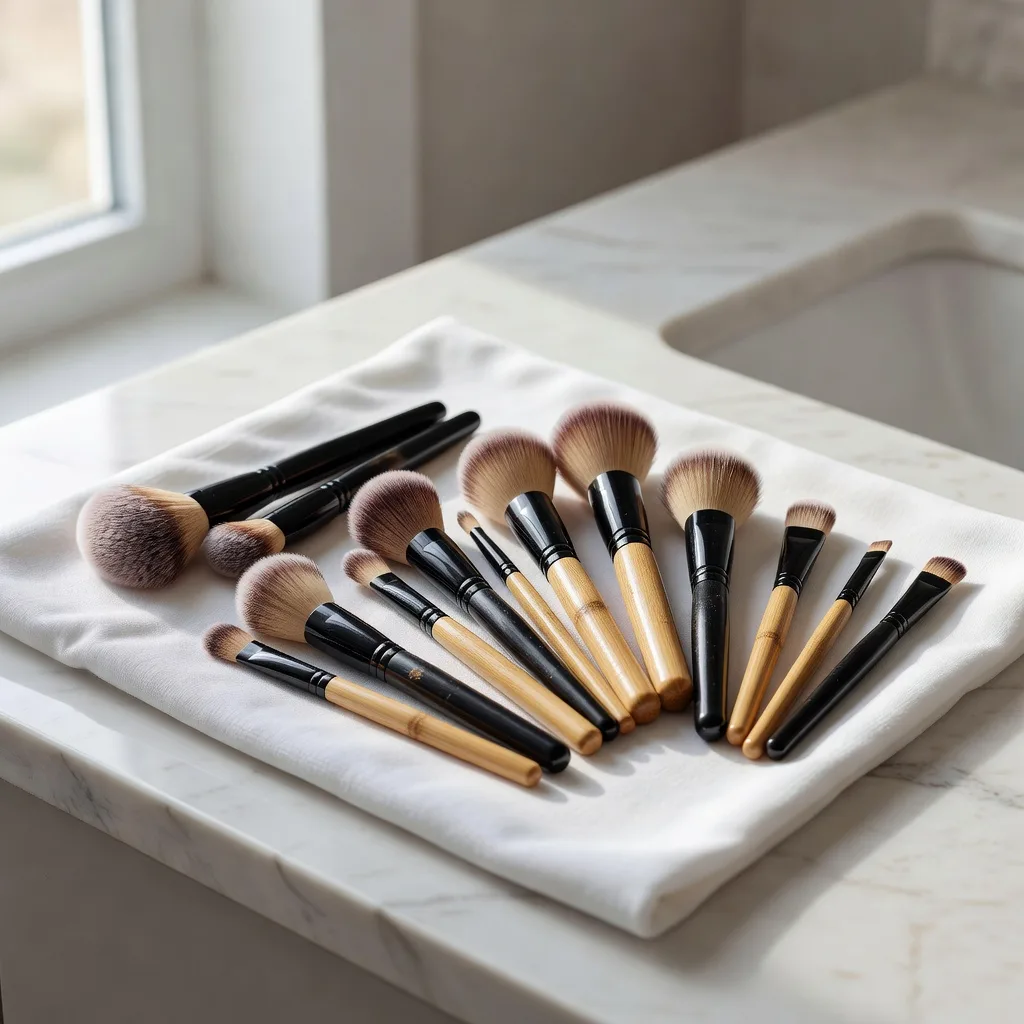
The best way to dry makeup brushes is to gently squeeze out as much water as you can with a clean towel, reshape the bristles with your fingers, and lay the brushes flat or angled with the bristles pointing slightly down so water drains away from the handle. Let the bristles hang over the edge of a counter or use a drying rack so air can reach all sides. Leave them to air-dry fully, usually overnight or up to a day for dense brushes, before using or storing them. Never dry brushes upright or with a hairdryer, which can loosen the glue and damage bristles.
In short: squeeze, reshape, lay flat or tilt down, let air circulate and wait until fully dry.
The American Academy of Dermatology suggests washing makeup brushes every seven to ten days and laying them flat on a towel with the tips hanging off the edge of the counter to dry, rather than standing them upright.
This guide explains why the drying position matters, compares common drying methods, and covers brush guards, racks, drying times and how to tell when a brush is truly dry.
Shopping these picks?
Amazon Prime members get fast, free shipping on eligible items, plus Prime Video, Amazon Music and member deals. New members can start with a free trial.
Start a free Prime trialAged 18 to 24? Prime for Young Adults comes with a longer free trial and a lower price after it.
Affiliate link: we may earn a commission at no extra cost to you.
Recommended Makeup Brush Drying Racks, Brush Guards and Brush Cleaners on Amazon



At a Glance
- Dry brushes flat or angled down, never upright.
- Squeeze out water with a towel before drying.
- Reshape bristles while they are wet.
- Let air reach all sides of the brush head.
- Avoid hairdryers, radiators and direct sun.
- Dense brushes and sponges take longest to dry.
- Only store or use brushes once they are completely dry.
In This Guide
- Why Drying Position Matters
- Drying Methods Compared
- How to Dry Makeup Brushes Step by Step
- How Long Do Makeup Brushes Take to Dry?
- Natural vs Synthetic Bristles: Does Drying Differ?
- Do Brush Guards and Drying Racks Help?
- Cleaning Products and Their Effect on Drying
- Common Drying Mistakes
- Drying Makeup Sponges and Other Tools
- Dos and Don’ts
- Honest Limits
- When to See a Dermatologist
- Frequently Asked Questions
- The Bottom Line
Why Drying Position Matters
A makeup brush is made of three parts: the bristles, the ferrule (the metal or plastic band) and the handle. The bristles are glued into the ferrule. When a brush dries standing upright, water runs down the bristles into the ferrule and sits against the glue.
Over time, trapped water can loosen the glue, causing bristles to shed or the head to wobble and detach from the handle. Water in wooden handles can also make them swell or crack. Damp, dark spaces inside the ferrule are also where mould and bacteria can grow, which may explain a musty smell from brushes that never seem to dry.
- Upright drying: water runs into the ferrule and weakens the glue.
- Flat drying: water stays mostly in the bristles and evaporates.
- Angled down drying: gravity pulls water away from the ferrule.
- Drying in a closed case or drawer: moisture is trapped and can smell or grow mould.
So the goal is simple: keep water out of the ferrule and let air reach the bristles. The AAD advice on how to clean your makeup brushes recommends exactly this: lay them flat on a towel with the tips hanging off the counter edge.
Drying Methods Compared
There are several ways to dry brushes. Some are free and effective, others save space, and a few are best avoided entirely.
| Method | How it works | Pros | Cons |
|---|---|---|---|
| Flat on a towel at the counter edge | Handles on the counter, bristles hanging off the edge | Free, easy, keeps water out of the ferrule | Takes counter space; bristles can flatten on one side if not hanging |
| Angled drying rack | Brushes rest tilted with heads pointing down | Good drainage, saves space | Needs a rack; must fit your brush sizes |
| Hanging upside-down rack | Brushes clip in with heads pointing straight down | Best drainage and airflow | Can stretch or splay soft bristles if clamps are tight |
| Rolled towel slope | Handles propped on a rolled towel so heads tilt down | Free, good drainage | Brushes can roll or slip |
| Upright in a cup | Heads up, handles in a cup | Convenient | Water runs into ferrule; can damage glue |
| Hairdryer or heat | Hot air or radiator | Fast | Can frizz bristles, melt glue and damage synthetic fibres |
For most people, laying brushes flat at the edge of a counter or bathroom shelf works perfectly well. A drying rack is useful if you clean many brushes at once or have limited space.
How to Dry Makeup Brushes Step by Step
Start drying straight after rinsing, while the bristles are still easy to shape.
Rinse with bristles pointing down
Keep the ferrule above the water flow so water does not run into it while rinsing.
Squeeze out excess water
Gently press the bristles in a clean towel or microfibre cloth; do not twist or pull.
Reshape the brush head
Use your fingers to smooth the bristles back to their original shape.
Add a brush guard if you like
Slide a mesh guard over fluffy or domed brushes to hold their shape.
Lay flat or tilt down
Place brushes on a towel with the heads hanging over the counter edge, or on a rack angled down.
Leave space between brushes
Air needs to reach all sides, so avoid piling brushes together.
Wait until fully dry
Check the base of the bristles near the ferrule before storing or using.
Wash brushes in the evening. By morning, most small and medium brushes are dry and ready to use, while you avoid the temptation to use them damp.
How Long Do Makeup Brushes Take to Dry?
Drying time depends on the brush size, bristle density, fibre type and how humid your room is. As a rough guide:
| Brush or tool | Typical drying time | Notes |
|---|---|---|
| Small eye and liner brushes | A few hours | Thin and quick to dry |
| Medium face brushes | Several hours to overnight | Check the base of the bristles |
| Large powder and kabuki brushes | Overnight to a full day | Dense centres hold water |
| Dense foundation buffing brushes | Up to a day | Squeeze thoroughly first |
| Makeup sponges | About a day | Squeeze in a towel, then air-dry in open space |
If a brush still feels cool or damp at the base of the bristles, it is not dry. Using or storing it early can lead to smells and bacteria growth. A small fan in the room or an open window can speed things up safely.
Natural vs Synthetic Bristles: Does Drying Differ?
Most modern brushes use synthetic fibres, but some powder and eyeshadow brushes still use natural hair. The basic drying method is the same for both, yet each type reacts a little differently to water and heat.
- Synthetic bristles absorb little water, so they usually dry faster and keep their shape well.
- Synthetic fibres can kink or frizz permanently if exposed to high heat, so hairdryers are especially risky.
- Natural hair absorbs more water and can take longer to dry, particularly in dense brushes.
- Natural bristles can become dry and brittle if washed with harsh soaps, so a gentle cleanser helps.
- Both types need the ferrule kept dry to protect the glue.
If you are not sure what your brushes are made of, treat them all gently: use lukewarm rather than hot water, squeeze instead of wringing, and let them dry at room temperature. Brushes used with cream and liquid products generally need washing and drying more often than powder brushes, so it helps to keep a spare foundation brush for days when your usual one is still drying.
Do Brush Guards and Drying Racks Help?
Neither is essential, but both can be useful, especially if you own many brushes or have soft, fluffy ones that lose their shape.
- Brush guards are mesh or elastic sleeves that hold bristles in shape while they dry.
- They are most useful for domed powder, blush and eyeshadow blending brushes.
- Choose a guard that fits snugly without squashing the bristles.
- Drying racks hold brushes at an angle or upside down to keep water out of the ferrule.
- Racks save counter space and help air circulate around each brush.
Brush guards can slow drying slightly because they cover the bristles. Leave a little of the tip exposed if your brushes take a long time to dry, and remove guards once brushes feel dry to the touch.
Cleaning Products and Their Effect on Drying
What you wash your brushes with affects how quickly and cleanly they dry. Heavy conditioners and oily cleansers can leave residue that makes bristles feel limp and slow down drying.
- A gentle, fragrance-free shampoo or dedicated brush cleaner works for most brushes.
- Rinse until the water runs clear; leftover soap can make bristles stiff.
- Quick-dry spray cleaners are useful between deep cleans but do not replace washing.
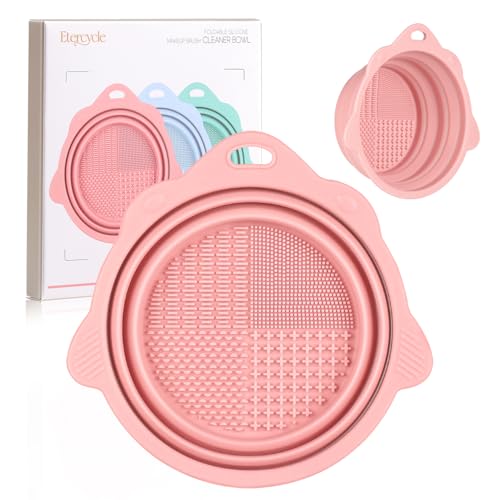
- Silicone cleaning mats help remove product from dense brushes without over-wetting them.
- Avoid soaking whole brushes in a cup of water or cleanser.
Our guide on how often makeup brushes need to be cleaned explains a realistic washing schedule for each type of brush.
Common Drying Mistakes
Most brush damage comes from habits that seem harmless. Watch out for these:
- Standing wet brushes upright in a cup or holder.
- Using a hairdryer, radiator or oven to speed things up.
- Leaving brushes to dry inside a closed case, bag or drawer.
- Drying brushes on a dirty towel that transfers lint or bacteria.
- Storing or using brushes while the base of the bristles is still damp.
- Twisting or wringing bristles to squeeze out water.
- Placing brushes in direct strong sunlight for long periods.
Do not use a damp or musty-smelling brush on your face. Damp bristles can harbour bacteria and mould, which may irritate skin or contribute to breakouts. Wash it again and dry it fully, or replace it if the smell remains.
Drying Makeup Sponges and Other Tools
Makeup sponges hold far more water than brushes, so they need extra care. Squeeze them firmly in a clean towel, then leave them in an open space where air can reach all sides, such as on a clean drying rack or open stand. Do not leave a damp sponge in a closed container, where it can grow mould.
Powder puffs, eyelash curler pads and silicone tools also need to dry fully after washing. Our guide on how to sanitise makeup tools covers cleaning and disinfecting the rest of your kit.
Dos and Don’ts
Worth Doing
- Squeeze water out gently with a towel
- Reshape bristles while wet
- Dry flat or with heads pointing down
- Let air circulate around each brush
- Wait until fully dry before storing
Skip It
- Dry brushes upright
- Use a hairdryer or radiator
- Twist or wring the bristles
- Store damp brushes in a closed case
- Use a brush that smells musty
Honest Limits
Good drying habits will make brushes last much longer, but they cannot fix a brush that is already shedding heavily or has a loose head. Cheaper brushes with weaker glue may still shed over time, even with careful drying.
There is also no need to buy special gadgets. Racks, guards and spinning dryers are conveniences, not necessities. A clean towel and the edge of a counter are enough for most people, and many brush-drying devices make claims about speed that depend heavily on the size and density of your brushes.
When to See a Dermatologist
- You get breakouts or irritation that seem linked to your makeup tools.
- A rash, itching or swelling appears after using a brush or a new cleaner.
- You have an eye infection; stop using eye brushes and makeup until it clears.
- Skin problems persist even after cleaning or replacing your brushes.
This article is for general information only and is not medical advice. Some people react to fragrances or ingredients in brush cleaners, so patch test new cleaners on your skin if you are sensitive, and see a board-certified dermatologist if irritation continues.
Frequently Asked Questions
What is the best way to dry makeup brushes?
Squeeze out water, reshape and lay flat or angled down to air-dry.
Why should brushes not dry upright?
Water runs into the ferrule and can loosen the glue.
Can I use a hairdryer to dry makeup brushes?
It is best avoided because heat can damage bristles and glue.
How long do makeup brushes take to dry?
A few hours for small brushes, up to a day for dense ones.
Are brush drying racks worth it?
They help if you have many brushes or little space, but are not essential.
Do brush guards work?
Yes, they help fluffy brushes keep their shape while drying.
Can I dry brushes overnight?
Yes, washing in the evening is ideal.
Why does my brush smell after washing?
It may have dried too slowly or stayed damp in the ferrule.
Can I use a damp brush for makeup?
It is better to wait until it is completely dry.
How should I dry makeup sponges?
Squeeze in a towel and leave in open air until fully dry.
The Bottom Line
The best way to dry makeup brushes is to squeeze out water gently, reshape the bristles and lay the brushes flat or angled down so water stays out of the ferrule and air can reach every side.
Avoid upright drying and heat, give dense brushes enough time, and only use or store brushes once they are completely dry to keep them hygienic and in good shape.

Written by
Registered pharmacist and founder of Facial Adviser. Rakib's pharmacy training covers how skincare actives work and interact; a later course in cosmetology turned that into a focus on facial treatments and skincare products. He plans, researches and edits every guide on the site and checks health claims against sources such as the American Academy of Dermatology, the FDA and the NIH. He is not a dermatologist; see the Editorial Policy and Medical Disclaimer.
About · Editorial policy · How we choose products · Medical disclaimer · Contact
Keep reading: Makeup brushes and tools
- 10 Best Makeup Brush Sets (2026): Soft, Well-Made Kits for Every Look
- How Often Do Makeup Brushes Need to Be Cleaned?
- IT Cosmetics Heavenly Luxe Complexion Perfection Brush #7: Is It Worth It?
- Hourglass Veil Powder Brush: Double-Ended Brush for a Smooth Finish
- 10 Best Foundation Brushes (2026): Flat, Buffing, Stippling or Angled
- 10 Best Makeup Organizers (2026): Drawers, Rotating Stands and Cases