10 Best Foundation Brushes (2026): Flat, Buffing, Stippling or Angled
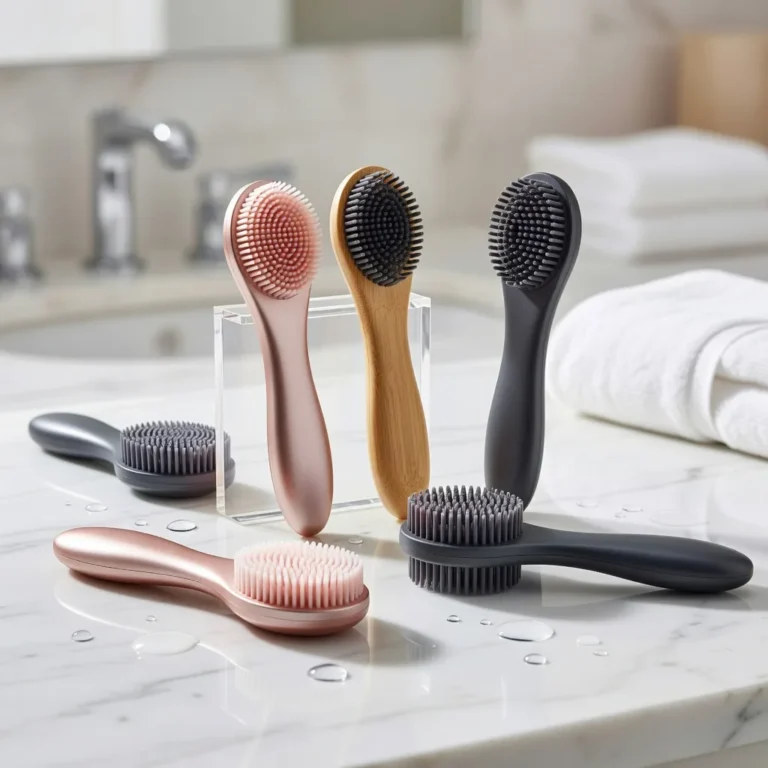
A foundation brush can make the same bottle of foundation look sheer and natural or full and polished. This list covers 10 options, from flat-top kabuki and angled brushes to stippling and travel brushes, with notes on the finish each gives and who it suits.
Part of our guide to makeup tools. Start with: 10 Best Makeup Brush Sets (2026): Soft, Well-Made Kits for Every Look
The best foundation brush for most people is a dense, synthetic buffing or flat-top kabuki brush, because it blends liquid and cream foundation quickly into a smooth, medium-coverage finish that looks like skin. A flat paddle brush gives the most coverage but can leave streaks unless you blend afterwards. A stippling or duo-fibre brush gives a light, airbrushed look and suits sheer formulas and dry skin. An angled brush follows the nose, jaw and hairline for precise blending. Choose synthetic bristles for liquids and creams, use light pressure, and wash the brush at least once a week so it does not spread oil and bacteria.
In short: a dense buffing or flat-top kabuki brush suits most skin and most foundations, and a stippling brush suits anyone who wants a lighter, softer finish.
Gentle technique matters for skin that breaks out. In its acne skin care tips, the American Academy of Dermatology warns that scrubbing the skin with sponges and other tools can irritate it, so a foundation brush should be buffed or pressed lightly, never scrubbed hard across the face.
Below you will find the ten picks, how we chose them, how the brush types compare, the finish each gives, how to apply foundation with a brush and how to keep it clean.
Shopping these picks?
Amazon Prime members get fast, free shipping on eligible items, plus Prime Video, Amazon Music and member deals. New members can start with a free trial.
Start a free Prime trialAged 18 to 24? Prime for Young Adults comes with a longer free trial and a lower price after it.
Affiliate link: we may earn a commission at no extra cost to you.
As an Amazon Associate we earn from qualifying purchases. This does not change which products we include.


Contents
- The 10 Best Foundation Brushes Right Now
- How We Chose These Products
- Foundation Brush Types Compared
- What Finish Does Each Foundation Brush Give?
- Choosing a Foundation Brush for Your Skin Type
- How to Apply Foundation With a Brush
- Synthetic vs Natural Bristles for Foundation
- How to Clean a Foundation Brush
- How to Spot a Good Foundation Brush
- Common Foundation Brush Mistakes
- Dos and Don’ts
- Honest Limits
- When to See a Dermatologist
- Questions People Ask
- The Takeaway
In Brief
- BK BEAUTY 101 Contoured Foundation Brush is our top pick for soft, streak-free blending of liquid and cream foundation.
- Sigma Beauty F80 Flat Kabuki is the classic dense flat-top buffer for smooth medium to full coverage.
- LAURA GELLER Retractable Angled Kabuki is best for precise blending around the nose and jaw, and travels well.
- Dense buffing and flat-top kabuki brushes suit most people and formulas.
- Stippling brushes give a light, airbrushed finish.
- Synthetic bristles work best with liquid and cream foundations.
- Wash foundation brushes at least weekly and dry them bristles down.
The 10 Best Foundation Brushes Right Now
These ten brushes were shortlisted from widely reviewed Amazon listings and ranked by head shape, density, bristle type and how clearly each seller explains its use. Each pick explains the finish it suits, its trade-offs and who should skip it.
| # | Product | Best For | Standout Feature | |
|---|---|---|---|---|
| 1 | BK BEAUTY 101 Contoured Foundation Brush | Liquid and cream foundation | Contoured head for streak-free blending | View |
| 2 | Sigma Beauty F80 Flat Kabuki | Smooth medium to full coverage | Dense flat-top buffing head | View |
| 3 | LAURA GELLER Retractable Angled Kabuki | Edges, nose and jawline | Retractable angled head for precise blending | View |
| 4 | LAURA GELLER Retractable Airbrush Kabuki | Building a fuller, polished base | Dense airbrush head builds coverage | View |
| 5 | DUcare Large Flat Top Kabuki, 3 Pack | Rotating clean brushes | Three flat-top brushes in one pack | View |
| 6 | Keshima Pro Flat Top Retractable Kabuki | Touch-ups on the go | Compact retractable flat-top brush | View |
| 7 | DPOLLA Foundation and Concealer Brush Set | Foundation plus concealer | Foundation and concealer brushes together | View |
| 8 | e.l.f. Precision Airbrush Blender | Detailed blending and small areas | Tightly packed angled precision head | View |
| 9 | Real Techniques Kabuki Foundation Brush | First foundation brush | Simple kabuki from an established brand | View |
| 10 | Keshima Duo-Fibre Stipple Brush | Sheer, airbrushed finish | Duo-fibre head for light coverage | View |
BK BEAUTY 101 Contoured Foundation Brush

Best for: Liquid and cream foundation
The BK BEAUTY 101 earns the top spot because it gets the basics of a foundation brush right without asking you to learn a special technique. Its listing describes an ultra-soft, contoured synthetic head designed for streak-free, airbrushed-looking coverage with liquid and cream foundation, and the brand says it is made with mature skin in mind.
It is also described as absorbing little product, so less foundation is wasted in the bristles. Compared with the #2 Sigma F80 it is shaped to follow the curves of the face rather than buffing with a flat top. It is a single-purpose brush, so it will not replace a stippling brush if you like a sheerer finish.
- Contoured brush for liquid and cream makeup
- Ultra-soft vegan synthetic fibres
- Designed for streak-free, even coverage
- Low product absorption
Pros
- Gentle on mature or sensitive skin
- Easy technique for beginners
- Wastes little foundation
Cons
- Single brush, no travel cap
- Less suited to powder foundation
Skip it if: Skip it if you mainly use powder foundation or want a very sheer, stippled finish.
Check Price on AmazonSigma Beauty F80 Flat Kabuki

Best for: Smooth medium to full coverage
The Sigma Beauty F80 is a classic dense flat-top kabuki, the shape most makeup guides recommend for buffing liquid and cream foundation into a smooth, skin-like finish. Its listing describes a dense, flat head designed for even coverage, synthetic fibres, a waterproof polymer handle and a size built for control.
It suits both beginners and experienced users, and it builds more coverage than the #10 Keshima stipple brush while giving a more even result than a paddle brush. Dense heads hold water after washing, so allow proper drying time, as the cleaning section explains. Compared with the #1 BK BEAUTY, it needs a little more buffing to avoid a heavy look.
- Dense flat-top kabuki head
- Designed for liquid and cream foundation
- Synthetic fibres with a waterproof handle
- Compact size for control
Pros
- Classic, versatile shape
- Builds coverage evenly
- Durable construction
Cons
- Dense head takes longer to dry
- Can look heavy if you use too much product
Skip it if: Skip it if you only wear sheer tints and prefer a light, stippled finish.
Check Price on AmazonLAURA GELLER Retractable Angled Kabuki

Best for: Edges, nose and jawline
The LAURA GELLER Retractable Angled Kabuki combines an angled head, which follows the nose, jaw and hairline, with a retractable design that protects the bristles in a makeup bag. Its listing describes a no-shed, vegan, high bristle-count brush for even, streak-free application of liquid, cream and powder products, so one brush can cover most of a base routine.
The angle makes it more precise than the #4 LAURA GELLER Airbrush Kabuki from the same brand, which is rounder and builds more coverage. The retractable handle is short, which some people find less comfortable than the long handle of the #2 Sigma F80. It is a good one-brush option if you only want to carry a single tool.
- Angled kabuki head
- Retractable, travel-friendly design
- No-shed, vegan, high bristle count
- Works with liquid, cream and powder
Pros
- Precise around the nose and jaw
- Protected bristles for travel
- Works with several formulas
Cons
- Short handle
- Smaller head covers large areas more slowly
Skip it if: Skip it if you prefer a long-handled brush for buffing large areas quickly.
Check Price on AmazonLAURA GELLER Retractable Airbrush Kabuki

Best for: Building a fuller, polished base
The LAURA GELLER Retractable Airbrush Kabuki is the pick for people who want fuller coverage without streaks. Its listing describes densely packed bristles that build a flawless, high-coverage base with an airbrushed look, and it works with powder and liquid foundation. Like the #3 angled version, it retracts for travel.
The rounder, denser head makes it better for building coverage than the angled #3 but less precise around the nose. It suits people who wear powder foundation as well as liquids, which several picks here do not. As with any dense brush, use light pressure and thin layers so coverage builds evenly instead of looking heavy.
- Dense airbrush-style kabuki head
- Builds high coverage with packed bristles
- Retractable, travel-friendly design
- Works with powder and liquid foundation
Pros
- Builds coverage without streaks
- Handles powder and liquid
- Travel-friendly
Cons
- Less precise on edges
- Short handle
Skip it if: Skip it if you want sheer, natural coverage and rarely wear full foundation.
Check Price on AmazonDUcare Large Flat Top Kabuki, 3 Pack

Best for: Rotating clean brushes
The DUcare Large Flat Top Kabuki pack is a practical choice for people who want a clean brush ready every day. Its listing describes dense, flat heads that buff and blend powder, liquid and cream without streaks, made with a multi-step process to limit shedding, and a flat tip that can pat and press product.
Having three brushes makes weekly washing easier, since one can dry while another is in use, which the cleaning section below recommends. Each brush is similar in shape to the #2 Sigma F80, but the large head suits people who like to cover the face quickly. It lacks the precision of the #8 e.l.f. angled brush.
- Three dense flat-top kabuki brushes
- Buffs and blends powder, liquid and cream
- Designed to limit shedding
- Flat tip for patting and pressing
Pros
- Spare brushes make hygiene easier
- Versatile for several formulas
- Large head works quickly
Cons
- Large head is less precise
- Three of the same shape, not a mixed set
Skip it if: Skip it if you want different brush shapes rather than several of the same.
Check Price on AmazonKeshima Pro Flat Top Retractable Kabuki
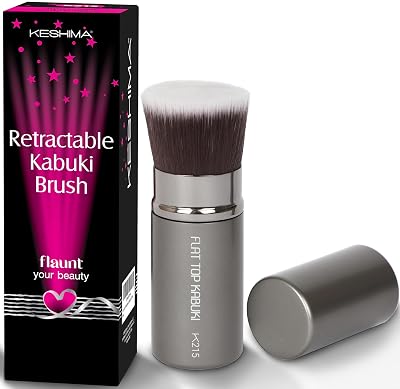
Best for: Touch-ups on the go
The Keshima Pro Flat Top Retractable Kabuki is designed to live in a handbag or travel kit. Its listing describes a soft yet firm synthetic head that gives a smooth, streak-free application, suits sensitive or mature skin, and works with powder or liquid foundation, which makes it handy for quick touch-ups during the day.
It offers the flat-top buffing shape of the #2 Sigma F80 in a portable format, and it is a simpler alternative to the two LAURA GELLER retractable picks. The compact size makes it slower for a full face at home, so many people use it alongside a full-size brush rather than instead of one. Clean the cap area too.
- Retractable flat-top kabuki
- Soft yet firm synthetic bristles
- Works with powder and liquid foundation
- Portable for touch-ups
Pros
- Protected bristles in a bag
- Gentle on sensitive skin
- Versatile across formulas
Cons
- Small for full-face use at home
- Short handle
Skip it if: Skip it if you want one full-size brush for daily use at home.
Check Price on AmazonDPOLLA Foundation and Concealer Brush Set
Best for: Foundation plus concealer
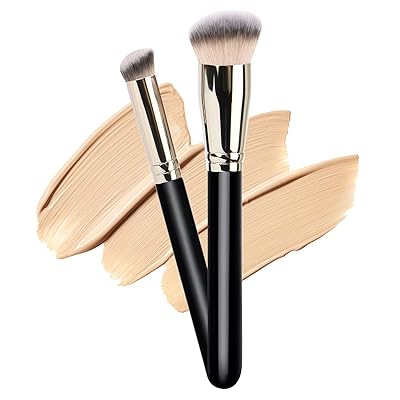
The DPOLLA set pairs a foundation brush with a concealer brush, which suits people who want matching tools for their whole base. Its listing describes a soft, dense foundation brush head that leaves no streaks with powder, liquid or cream, made from synthetic vegan fibres designed not to shed during regular use.
The smaller concealer brush is useful under the eyes and around the nose, areas a large kabuki such as the #5 DUcare struggles to reach. It is less established than the #2 Sigma or #1 BK BEAUTY brands, and the listing is lighter on detail about head shape, so it suits people who want a simple two-brush starter kit.
- Foundation brush plus concealer brush
- Soft, dense synthetic head
- Works with powder, liquid and cream
- Designed not to shed
Pros
- Covers foundation and concealer
- Good starter pair
- Synthetic, vegan fibres
Cons
- Less detail on head shape
- Less established brand
Skip it if: Skip it if you already own a concealer brush and only need a foundation brush.
Check Price on Amazone.l.f. Precision Airbrush Blender

Best for: Detailed blending and small areas
The e.l.f. Precision Airbrush Blender is an angled, tightly packed brush designed for precise application of liquids, creams or powders. Its white synthetic fibres make it easy to see where product sits, which helps with careful blending around the nose, under the eyes and along the jaw, where larger brushes tend to leave edges.
It is smaller and more precise than the #5 DUcare kabuki, so it is slower for a full face but excellent for spot coverage and edges. The ergonomic handle is comfortable, and the brand notes it is vegan and cruelty-free. White bristles show staining quickly, which is a reminder to wash it regularly.
- Tightly packed angled brush
- White synthetic fibres show product placement
- Works with liquids, creams and powders
- Ergonomic, vegan and cruelty-free
Pros
- Very precise blending
- Easy to see product on bristles
- Useful for concealer too
Cons
- Slow for a full face
- White bristles show stains
Skip it if: Skip it if you want one large brush to apply foundation quickly all over.
Check Price on AmazonReal Techniques Kabuki Foundation Brush

Best for: First foundation brush
The Real Techniques Kabuki Foundation Brush comes from a well-established makeup tool brand and is described as a kabuki brush for powder, cream and liquid foundation. A kabuki shape is one of the easiest to learn, because buffing in small circles blends product evenly without much technique or practice, even on a first try.
Its listing gives less detail than most picks here, so we have described it only from what its title states. It is a straightforward alternative to the #2 Sigma F80 for people buying their first brush, and it covers more formulas than the liquid-focused #1 BK BEAUTY. For a sheer finish, the #10 Keshima stipple brush suits better.
- Kabuki foundation brush
- Works with powder, cream and liquid
- Single brush
- From an established tool brand
Pros
- Easy shape to learn
- Versatile across formulas
- Widely available brand
Cons
- Listing gives limited detail
- No travel cap stated
Skip it if: Skip it if you want a brush whose listing clearly explains its density and fibres.
Check Price on AmazonKeshima Duo-Fibre Stipple Brush
Best for: Sheer, airbrushed finish
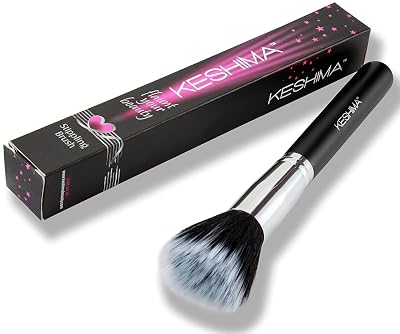
The Keshima Stipple Brush is the stippling pick on this list, a duo-fibre brush for powder and liquid makeup. As the brush types section explains, duo-fibre stippling heads pick up less product and deposit it in light dots, which blends into a soft, airbrushed finish that suits sheer formulas and dry or textured skin.
Its listing gives less detail than most picks here, so we have described it mainly from what its title states. It gives much lighter coverage than the dense #2 Sigma F80 or #4 LAURA GELLER Airbrush, so it suits people who want skin to show through. Use a tapping motion rather than sweeping, and wash it often.
- Duo-fibre stippling brush
- For powder and liquid makeup
- Designed for a light, airbrushed finish
- Suits sheer and buildable formulas
Pros
- Soft, natural-looking finish
- Good for sheer foundations
- Gentle tapping motion suits dry skin
Cons
- Slow to build full coverage
- Listing gives limited detail
Skip it if: Skip it if you want full coverage quickly from a dense brush.
Check Price on AmazonHow We Chose These Products
We shortlisted foundation brushes from Amazon listings that are highly rated by a large number of shoppers, favouring established brands and fuller-featured single brushes over large mixed sets. We looked for a spread of shapes, including flat-top kabuki, angled, airbrush and stippling heads, and checked listed features against the AAD advice on gentle technique and clean tools cited in this post.
These are research-based picks, not hands-on lab tests. We did not use the brushes ourselves, so rankings reflect listing detail, head shape and bristle type rather than personal results. Where a listing gave little detail, as with the Real Techniques and Keshima Stipple picks, we described them mainly from their titles.
- Strong ratings from a large number of shoppers
- Established brands and dedicated foundation brushes preferred
- A spread of head shapes for different finishes
- Synthetic bristles favoured for liquid and cream foundation
- Large mixed brush sets and thin listings excluded
Foundation Brush Types Compared
Foundation brushes fall into four main groups. Each has a different shape, density and ideal movement.
| Brush type | Shape and density | How to move it | Best for |
|---|---|---|---|
| Flat or paddle | Flat, tapered, firm | Paint in downward strokes, then blend | Full coverage, thicker formulas |
| Buffing or flat-top kabuki | Round or flat top, very dense | Small circles or light buffing | All-round use, medium coverage |
| Stippling or duo-fibre | Two lengths of bristle, loose top | Tap or stipple, then light circles | Sheer coverage, dry skin |
| Angled | Dense, cut at a slant | Sweep along contours and edges | Nose, jaw, hairline, sculpting |
| Oval or toothbrush style | Dense, curved, flat face | Sweep in long strokes | Fast application, smooth finish |
If you only want one brush, a dense flat-top kabuki is the most forgiving. It works with most liquid, cream and stick foundations, blends edges well and rarely leaves obvious streaks. Add a stippling brush if you sometimes want a lighter, softer finish, and an angled brush if you find it hard to blend around the nose and along the jaw. Most people never need more than these three.
What Finish Does Each Foundation Brush Give?
The brush changes the finish as much as the formula does. Use this table to match the brush to the look you want.
| Brush | Coverage | Finish | Texture and pores |
|---|---|---|---|
| Flat paddle | Medium to full | Smooth but can streak | Can emphasise texture if not blended |
| Buffing kabuki | Medium, buildable | Polished, even | Blurs pores well when buffed |
| Stippling duo-fibre | Sheer to light | Soft, airbrushed | Gentle over dry patches |
| Angled | Medium | Precise, sculpted edges | Good around the nose |
| Oval | Medium to full | Smooth, seamless | Blurs well with light pressure |
Formula matters too. Thin, runny foundations can be hard to control with a loose stippling brush, while very thick formulas can drag under a paddle brush. Our article on how particle size affects foundation finish explains why some formulas look smoother than others whatever tool you use.
Brush versus sponge versus fingers is mostly a question of finish. Brushes usually give more coverage and a more polished look, sponges give a softer, more skin-like finish, and fingers warm cream products so they melt in. None is healthier than the others if it is kept clean.
Choosing a Foundation Brush for Your Skin Type
- Dry skin: a stippling or soft buffing brush pressed gently avoids lifting dry flakes.
- Oily skin: a dense buffing brush works foundation in thinly so it lasts longer and looks less heavy.
- Combination skin: a flat-top kabuki with a lighter touch on dry areas and more buffing on the T-zone.
- Acne-prone skin: a synthetic brush that is washed often, with light pressure over spots to avoid irritation.
- Mature skin: a stippling or soft oval brush lays thin layers that sit less in fine lines.
- Textured skin: buff in small circles to blur pores, then press lightly to set the layer.
Whatever your skin type, prep matters. Moisturiser and sunscreen that have not settled can pill or slide under a brush, and foundation that separates by lunchtime is often a prep or formula issue. Our guide on why foundation separates mid-day goes through the usual causes.
How to Apply Foundation With a Brush
These steps work with a buffing or flat-top kabuki brush and most liquid or cream foundations.
Prep the skin
Apply moisturiser and sunscreen and wait a few minutes so the base can settle.
Dispense a small amount
Put one or two pumps on the back of your hand rather than straight onto the brush.
Dot it on
Dab the brush into the foundation and dot it onto the forehead, cheeks, nose and chin.
Buff from the centre out
Blend in small, light circles from the centre of the face towards the hairline and jaw.
Build where needed
Add a thin second layer only on areas that need more coverage, such as redness around the nose.
Blend the edges
Use the angled brush or a clean part of the brush to soften the jawline, hairline and around the nostrils.
Press and set
Pat the brush lightly over the face to remove streaks, then set with powder if you need it.
If you see streaks, switch from sweeping to pressing. Stippling a few taps over the streaky area with a nearly clean brush usually melts the lines away without adding more product.
With a flat paddle brush, the method changes slightly. Paint thin stripes of foundation outward from the centre of the face, then go back over them with a buffing brush, sponge or clean fingertips to erase the edges. With a stippling brush, tap the foundation onto the skin first and only then use light circles, so the loose top bristles do not drag the product into streaks.
Synthetic vs Natural Bristles for Foundation
Synthetic bristles are the standard choice for liquid and cream foundation. They do not soak up as much product as natural hair, they are easier to wash and dry, and they keep their shape well.
- Synthetic: best for liquid, cream, stick and cushion foundations; easy to clean; suitable for vegan routines.
- Natural hair: better suited to powder foundation and loose powder; absorbs liquid and can become matted.
- Duo-fibre: usually a mix of fibres, designed to pick up small amounts for a sheer finish.
If you use powder foundation, a soft, dense kabuki brush of either type works well. For everything else, choose synthetic.
How to Clean a Foundation Brush
Foundation brushes hold a lot of product, oil and dead skin in their dense centres, so they need regular cleaning. Our guide on how often makeup brushes need to be cleaned sets out a schedule for every type.
- Rinse the bristles under lukewarm water, pointing them down.
- Work in a mild, fragrance-free cleanser, gentle soap or brush shampoo, massaging the base of the bristles.
- Rinse and repeat until the water runs clear; dense brushes often need two or three rounds.
- Squeeze out water with a clean towel and reshape the head.
- Dry flat or bristles down, away from direct heat.
- Wash at least once a week if you use it daily, and more often if you are prone to breakouts.
Do not soak the whole brush or stand it upright to dry while wet. Water in the ferrule loosens the glue, makes bristles shed and can allow mould to grow inside the brush. Replace any brush that smells, sheds badly or has a loose head.
How to Spot a Good Foundation Brush
You cannot judge a brush by its packaging, but a few simple checks tell you a lot about how it will perform and how long it will last.
- Density: press the bristles against your palm. A good buffing brush springs back and feels firm, not floppy.
- Softness: sweep it over the inside of your wrist. Scratchy bristles will feel worse on the face and can irritate sensitive skin.
- Shedding: gently tug the bristles. More than one or two loose hairs is a sign of poor gluing.
- Ferrule: the metal part should be tight and not twist on the handle.
- Size: a head roughly the size of a large coin suits most faces; very large heads are slow around the nose and eyes.
- Handle: choose a length you can control comfortably, especially if you apply makeup in a small mirror.
Replace foundation brushes when bristles splay, shed heavily, stay stained or smell after washing. With gentle care, a good synthetic brush can last a long time, but a worn brush spreads product unevenly and is harder to clean. Store dry brushes upright in a clean cup or flat in a ventilated case, away from steam, dust and hairspray.
Common Foundation Brush Mistakes
- Pressing hard and scrubbing, which irritates skin and lifts dry patches.
- Loading too much product, which gives a heavy, cakey result.
- Using a paddle brush without blending, which leaves visible stripes.
- Using a dirty brush, which makes the finish patchy and adds bacteria to the skin.
- Choosing a loose stippling brush for a runny, full-coverage formula.
- Stopping at the jawline and leaving a line.
Most of these come down to pressure and amount. Start with less product than you think you need, move the brush lightly and add more only where you can see it is missing.
Dos and Don’ts
Try This
- Choose a dense synthetic brush for liquids
- Use light buffing or stippling movements
- Build coverage in thin layers
- Blend down past the jawline
- Wash the brush every week
Avoid This
- Scrub the brush across your skin
- Pour foundation straight onto the brush
- Leave streaks from a paddle brush
- Dry brushes upright while wet
- Share foundation brushes
Honest Limits
A foundation brush cannot fix the wrong shade, an unsuitable formula or poor skin preparation. It will not stop an oily formula from sliding, make a heavy foundation look sheer, or hide deep texture completely. It simply changes how evenly the product is spread.
Claims that one brush shape is essential are marketing. Many people get excellent results with fingers or a sponge, and the brush that suits you is the one you can use comfortably, blend well with and keep clean. More expensive brushes are not automatically better; bristle softness, density and shape matter far more than the price.
When to See a Dermatologist
- Breakouts keep appearing where you apply foundation even with a clean brush.
- You get redness, itching or a rash after using makeup or brush cleaners.
- You rely on heavy coverage to hide acne, rosacea or dark patches.
- Dry, flaky patches do not improve with moisturiser.
This article is for general information and does not replace professional medical advice. If makeup or tools irritate your skin, stop using them and see a board-certified dermatologist.
Questions People Ask
What is the best type of foundation brush?
A dense synthetic buffing or flat-top kabuki brush suits most people.
Is a brush or sponge better for foundation?
A brush usually gives more coverage; a sponge gives a softer, more natural finish.
Which foundation brush on this list gives an airbrushed finish?
The Keshima Duo-Fibre Stipple Brush for a sheer finish, or the LAURA GELLER Airbrush Kabuki for fuller, blended coverage.
Why does my foundation brush leave streaks?
Too much product, too much pressure or a flat brush that was not blended.
Should foundation brushes be synthetic?
Yes for liquid and cream foundation.
Is the most expensive foundation brush worth it?
Not always. BK BEAUTY and Sigma focus on refined heads and durability, but a Real Techniques or DUcare kabuki blends foundation well for everyday use.
How often should I wash my foundation brush?
At least once a week if used daily.
Can a dirty foundation brush cause acne?
It can add oil and bacteria to the skin and may worsen breakouts.
Which foundation brush is best for sensitive or mature skin?
BK BEAUTY 101, which is designed with mature skin in mind, or the soft Keshima Retractable Kabuki.
What is an angled foundation brush for?
Blending around the nose, jawline and hairline and for sculpting.
The Takeaway
The best foundation brush for most people is a dense synthetic buffing or flat-top kabuki brush, with a stippling brush for lighter coverage and an angled brush for edges.
Use small amounts of product, light pressure and thin layers, and wash your brush every week so it keeps giving a smooth, even base without irritating your skin.
Our top pick: BK BEAUTY 101 Contoured Foundation Brush
The BK BEAUTY 101 Contoured Foundation Brush takes the top spot because its soft, contoured synthetic head blends liquid and cream foundation into a smooth, streak-free finish and is designed with mature skin in mind. Choose the Sigma F80 Flat Kabuki instead if you want a classic dense flat-top buffer, or the Keshima Stipple Brush if you prefer a lighter, airbrushed finish.
Check Price on Amazon
Written by
Registered pharmacist and founder of Facial Adviser. Rakib's pharmacy training covers how skincare actives work and interact; a later course in cosmetology turned that into a focus on facial treatments and skincare products. He plans, researches and edits every guide on the site and checks health claims against sources such as the American Academy of Dermatology, the FDA and the NIH. He is not a dermatologist; see the Editorial Policy and Medical Disclaimer.
About · Editorial policy · How we choose products · Medical disclaimer · Contact
Keep reading: Makeup brushes and tools
- 10 Best Makeup Brush Sets (2026): Soft, Well-Made Kits for Every Look
- 10 Best Makeup Organizers (2026): Drawers, Rotating Stands and Cases
- 10 Best Eyeliner Brushes (2026): Sharp Wings and Clean Gel Lines
- 10 Best Makeup Mirrors (2026): True-Colour Light and Clear Detail
- Best Airbrush Makeup Compressor: Types, Features and How to Choose
- 10 Best Bronzer Brushes (2026): Soft, Streak-Free Warmth