10 Best Eyeshadow Brushes (2026): Blend, Pack and Smoke Like a Pro
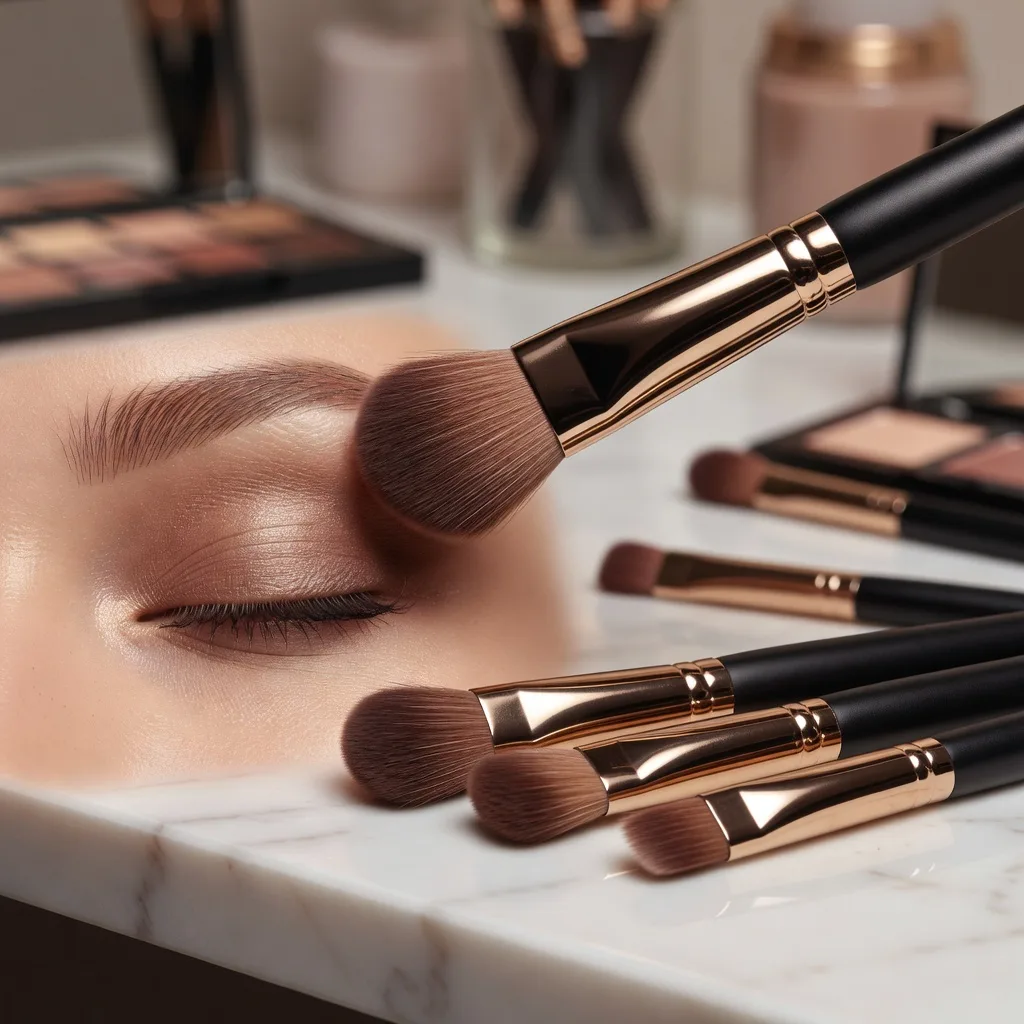
Eyeshadow is only as good as the brush that puts it on. The same palette can look soft and diffused or patchy and harsh depending on the shape, density and hair of the brush. This list covers 10 options, from single blending and detail brushes to eye-only sets for beginners.
Part of our guide to makeup tools. Start with: 10 Best Makeup Brush Sets (2026): Soft, Well-Made Kits for Every Look
The best eyeshadow brushes for most people are a small set of three to five synthetic brushes: a flat shader brush to pack colour on the lid, a fluffy blending brush to soften edges, a tapered crease brush to add depth, a small pencil brush for detail and the lower lash line, and a short smudge brush for smoky looks. Synthetic hair works well with both powder and cream shadows, is easier to clean and suits people who avoid animal products. Natural hair can feel softer with powders but needs more care. Clean eye brushes regularly and never share them, because they touch a sensitive, infection-prone area.
In short: start with a shader, a blending brush and a pencil brush, add a crease and smudge brush later, and keep them clean.
The US Food and Drug Administration’s advice on eye cosmetic safety is to wash your hands before applying eye makeup, make sure any instrument used near the eye is clean and not to share cosmetics, since another person’s bacteria may be hazardous to you.
Below you will find the ten picks, how we chose them, each brush type, synthetic vs natural hair, how to use your brushes in the right order and how to clean them.
Shopping these picks?
Amazon Prime members get fast, free shipping on eligible items, plus Prime Video, Amazon Music and member deals. New members can start with a free trial.
Start a free Prime trialAged 18 to 24? Prime for Young Adults comes with a longer free trial and a lower price after it.
Affiliate link: we may earn a commission at no extra cost to you.
As an Amazon Associate we earn from qualifying purchases. This does not change which products we include.


Jump to a Section
- The 10 Best Eyeshadow Brushes Right Now
- How We Chose These Products
- Eyeshadow Brush Types and What Each One Does
- Choosing the Right Size for Your Eye Shape
- Synthetic vs Natural Hair Eyeshadow Brushes
- How to Apply Eyeshadow With Brushes Step by Step
- Brushes for Cream, Glitter and Pressed Pigments
- How to Clean Eyeshadow Brushes
- When to Replace Eyeshadow Brushes
- Building a Starter Eyeshadow Brush Kit
- Dos and Don’ts
- Honest Limits
- When to See a Doctor or Dermatologist
- FAQ
- Summing Up
In Brief
- Sigma Beauty E45 is our top pick for precise crease blending, especially on hooded eyes.
- Jessup 15-Piece Eyeshadow Brush Set is the best complete eye-only kit.
- docolor 15-Piece Eyeshadow Brush Set is the best gift set.
- A shader, a blending brush and a pencil or smudge brush cover most eye looks.
- Flat, dense brushes pack colour; fluffy, loose brushes diffuse it.
- Clean eye brushes often and let them dry flat or bristles down.
- Never share eye brushes or use them during an eye infection.
The 10 Best Eyeshadow Brushes Right Now
These ten picks were shortlisted from widely reviewed Amazon listings and mix single brushes for blending and detail with eye-only sets for building a kit. Each pick explains who it suits, its trade-offs and who should look elsewhere.
| # | Product | Best For | Standout Feature | |
|---|---|---|---|---|
| 1 | Sigma Beauty E45 Small Tapered Blending Brush | Crease definition and hooded eyes | Tapered tip for precise, soft blending | View |
| 2 | Jessup 15-Piece Eyeshadow Brush Set T499 | Building a full eye kit at once | Fifteen eye brushes including liner | View |
| 3 | docolor 15-Piece Eyeshadow Brush Set | Gifting or a first full set | Gift-boxed set with soft synthetic hair | View |
| 4 | Sigma Beauty E25 Blending Brush | Soft, all-over transitions | Round head for seamless blending | View |
| 5 | EIGSHOW Smudge and Eyeliner Brush Set | Smudged liner and lower lash line | Angled liner plus curved smudge brush | View |
| 6 | Real Techniques Everyday Eye Essentials Set | First eye brush kit | Eight essentials including lash separator | View |
| 7 | e.l.f. Smoky Eye Brush Kit (5-Piece) | Building a smoky eye | Five brushes chosen for smoky looks | View |
| 8 | e.l.f. Fluffy Eye Blender Brush | Blending shadow and setting concealer | Fluffy blender that also sets concealer | View |
| 9 | NYX Professional Makeup Pro Blending Brush | A simple extra blending brush | Single pro-style blending brush | View |
| 10 | DUcare 5-Piece Double-Sided Eye Brush Set | Small bags and minimal kits | Five double-ended brushes, including brow | View |
Sigma Beauty E45 Small Tapered Blending Brush

Best for: Crease definition and hooded eyes
The Sigma E45 earns the top spot because it does the job most people struggle with: placing a deeper shade in the crease and blending it out without spreading colour everywhere. Its very tapered, pointed head gives more control than a large fluffy blender, and the listing notes that it works particularly well on hooded eyes, where space above the lid is limited.
Sigma’s own synthetic fibres are made for precise blending and suit powders and many creams. The handle is waterproof and the brush is compact, so it travels well. As a single brush it will not cover every step on its own, so pair it with a flat shader or choose a set like the #6 Real Techniques if you are starting from nothing.
- Very tapered, pointed head for depth and dimension
- Brand’s own synthetic fibres for precise blending
- Suits hooded eyes and all eye shapes
- Compact, waterproof polymer handle
Pros
- Excellent control in the crease
- Good for hooded or small lids
- Durable, easy-clean build
Cons
- Only one brush, not a full kit
- Too small for fast all-over washes of colour
Skip it if: Skip it if you want a complete kit in one purchase; the #6 Real Techniques set covers more steps.
Check Price on AmazonJessup 15-Piece Eyeshadow Brush Set T499

Best for: Building a full eye kit at once
Jessup’s fifteen-piece eye set is the pick for people who want every eye shape in one go, from shaders and blenders to liner brushes. Jessup is a well-established brush maker, and an eye-only set avoids paying for face brushes you may never use, which is a common problem with large mixed kits.
The listing detail beyond the title is limited, so check the product photos to see which shapes are included. Fifteen brushes is more than most people need day to day, and a big set takes longer to wash properly. It covers more ground than the #6 Real Techniques kit, while the #1 Sigma remains the better single blending brush.
- Fifteen-piece eye brush set
- Includes eyeshadow and eyeliner brushes
- Professional-style eye-only selection
- From an established brush brand
Pros
- Many shapes in one purchase
- Eye-only, so no wasted face brushes
- Good for experimenting with looks
Cons
- More brushes than most people need
- Limited detail in the listing
Skip it if: Skip it if you only want two or three essentials; the #1 Sigma and #5 EIGSHOW cover the basics.
Check Price on Amazondocolor 15-Piece Eyeshadow Brush Set
Best for: Gifting or a first full set
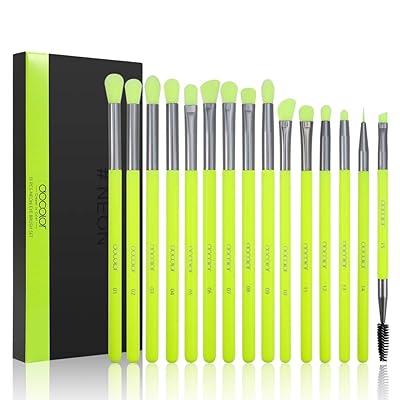
The docolor fifteen-piece set is the pick for gifting or for anyone who wants a complete, good-looking kit. It includes eyeshadow, crease and concealer brushes with thick, soft synthetic fibres, and it arrives in gift-box packaging, which makes it a straightforward present for someone getting into eye makeup or wanting to replace a tired old kit.
The brand says the brushes are handmade and vegan. Because it includes a few concealer brushes, it is slightly less eye-focused than the #2 Jessup set. The bright colour design will appeal to some and not others. For precise crease work, many people will still reach for a single brush like the #1 Sigma E45.
- Fifteen brushes including eyeshadow, crease and concealer shapes
- Thick, soft vegan synthetic fibres
- Handmade construction
- Gift-box packaging
Pros
- Ready to give as a present
- Soft synthetic bristles
- Covers eyes and small concealer areas
Cons
- Some brushes are for concealer, not shadow
- Bold colour design is not for everyone
Skip it if: Skip it if you want a minimal kit; a single brush or the #10 DUcare set is simpler.
Check Price on AmazonSigma Beauty E25 Blending Brush

Best for: Soft, all-over transitions
The Sigma E25 is the pick for soft transition shades and fast blending. Its rounded, fluffy head is larger than the #1 E45, so it covers the crease and above in a few strokes and softens harsh edges left by darker shades. The listing positions it for every skill level, which makes it a forgiving brush for beginners.
Like the E45, it uses Sigma’s synthetic fibres, a corrosion-resistant ferrule and a waterproof handle. The two Sigma brushes work well as a pair: the E25 for the wash of colour and the E45 for depth. On small or hooded lids, the E25 can spread colour too wide, so the tapered E45 is the safer first buy.
- Rounded head for smooth colour transitions
- Designed for every skill level
- Synthetic fibres that pick up and distribute evenly
- Corrosion-resistant ferrule and waterproof handle
Pros
- Very forgiving for beginners
- Softens harsh edges quickly
- Durable build
Cons
- Can spread colour too wide on small lids
- Single brush only
Skip it if: Skip it if you have hooded eyes and little lid space; the #1 E45 is more precise.
Check Price on AmazonEIGSHOW Smudge and Eyeliner Brush Set

Best for: Smudged liner and lower lash line
EIGSHOW’s two-brush set is the pick for detail work along the lash line. It pairs a fine angled eyeliner brush for clean lines with a short, curved smudge brush for softening shadow or pencil along the upper and lower lashes, which is the quickest way to add definition without a full smoky eye.
The brushes are described as fully handmade. They complement a blending brush rather than replace it, so they work best alongside the #1 Sigma E45 or #4 E25. For a full smoky look in one kit, the #7 e.l.f. Smoky Eye Brush Kit is more complete, while this set is more focused on precise edges.
- Set of an angled eyeliner brush and a smudge brush
- Fine angled tip for clean liner
- Short, curved smudge brush for the lash line
- Handmade brush assembly
Pros
- Great for smudged liner
- Precise angled tip
- Small, focused set
Cons
- Not for blending the crease
- Only two brushes
Skip it if: Skip it if you never wear liner or lower lash shadow.
Check Price on AmazonReal Techniques Everyday Eye Essentials Set

Best for: First eye brush kit
Real Techniques’ Everyday Eye Essentials set is the pick for beginners because it covers each step without overwhelming you. It includes crease, defining crease, shadow, shading and smudge brushes, plus definer and fine liner brushes and a lash separator, so one purchase handles base colour, depth, liner and finishing, with room to grow as your skills improve.
The brand uses its UltraPlush synthetic bristles throughout, which suit powders and creams and are easy to clean. Eight tools is a manageable number to learn, compared with the fifteen in the #2 Jessup and #3 docolor sets. More experienced users may still want a precise tapered brush like the #1 Sigma E45 alongside it.
- Eight-piece eye brush set
- Crease, shadow, shading and smudge brushes
- Definer and fine liner brushes plus lash separator
- UltraPlush synthetic bristles; vegan and cruelty-free
Pros
- Covers every basic step
- Manageable number of brushes
- Well-known, widely stocked brand
Cons
- Fewer shapes than fifteen-piece sets
- Some tools overlap for simple looks
Skip it if: Skip it if you already own a basic kit and only need a better blender.
Check Price on Amazone.l.f. Smoky Eye Brush Kit (5-Piece)

Best for: Building a smoky eye
e.l.f.’s five-piece kit is built around one look, the smoky eye, which makes it a practical pick for people who wear darker, blended shadow for evenings or events. A smaller kit with a clear purpose is easier to use than a large set, and five brushes are enough to pack colour, blend, smoke out the lash line and clean up edges.
The listing detail is limited to the title, so check the images for exact shapes. It overlaps with the #5 EIGSHOW set for lash line work but adds blending brushes, making it more complete for this specific look. Beginners wanting everyday soft looks may find the #6 Real Techniques set more flexible.
- Five-piece eye brush kit
- Selected for creating a smoky eye
- Covers packing, blending and smudging
- From a widely available brand
Pros
- Focused on one popular look
- Compact kit
- Easy to understand
Cons
- Limited listing detail
- Less flexible for everyday soft looks
Skip it if: Skip it if you rarely wear dark or smoky shadow.
Check Price on Amazone.l.f. Fluffy Eye Blender Brush

Best for: Blending shadow and setting concealer
The e.l.f. Fluffy Eye Blender is the pick for a simple, soft blending brush that does more than one job. The title says it blends eyeshadow and can also be used to set concealer under the eyes, which makes it a useful extra for people who want one fluffy brush for the whole eye area.
It is similar in purpose to the #4 Sigma E25, but it comes from a more budget-friendly range and the listing gives less detail on fibres and build. A fluffy blender is best for soft transitions rather than precise depth, so pair it with a tapered brush like the #1 Sigma E45 if you want definition.
- Fluffy eye blending brush
- Blends eyeshadow easily
- Can set concealer under the eyes
- From a widely available brand
Pros
- Two uses in one brush
- Soft blending
- Easy to find
Cons
- Less detail on fibres and build
- Not precise enough for sharp crease work
Skip it if: Skip it if you already own the #4 Sigma E25 or a similar fluffy blender.
Check Price on AmazonNYX Professional Makeup Pro Blending Brush

Best for: A simple extra blending brush
The NYX Pro Blending Brush is the pick for someone who wants one straightforward blending brush from a widely stocked makeup brand. A second blender is surprisingly useful because you can keep one for light shades and one for darker colours, which keeps transitions clean without washing mid-routine or wiping the brush on a tissue.
The listing gives only the product name, so check the photos for head size before buying. It is less specialised than the tapered #1 Sigma E45 and less documented than the #4 Sigma E25. It suits people who want a spare brush for travel or a separate blender for dark shades.
- Single eyeshadow blending brush
- Pro-style design from a makeup brand
- Suits soft transition shades
- Works as a spare or travel blender
Pros
- Simple, useful second blender
- From a well-known brand
- Easy to replace
Cons
- Very little listing detail
- Less precise than tapered brushes
Skip it if: Skip it if you want a detailed spec sheet or a complete set.
Check Price on AmazonDUcare 5-Piece Double-Sided Eye Brush Set

Best for: Small bags and minimal kits
DUcare’s set is the pick for a compact kit that still covers many shapes. Each of the five brushes is double-sided, so you get far more heads than handles, and the set includes an eyebrow brush for grooming or filling brows, which is handy for a travel bag or a small drawer.
The listing describes soft synthetic hair, which suits both powders and creams. Double-ended brushes are shorter to hold and can be awkward if you like long handles. It is less comprehensive than the #6 Real Techniques kit but more versatile per brush than single-ended sets of the same size, and it makes a sensible backup kit.
- Five double-sided brushes
- Includes an eyebrow brush
- Soft synthetic hair
- Compact size for travel
Pros
- Many brush heads in a small kit
- Covers brows too
- Easy to pack
Cons
- Shorter handles
- Brush heads can be harder to tell apart
Skip it if: Skip it if you prefer full-length handles and single-ended brushes.
Check Price on AmazonHow We Chose These Products
We shortlisted eyeshadow brushes from Amazon listings that are highly rated by a large number of shoppers, favouring established brush brands and fuller-featured sets and singles with clear details on shape, fibre and use. We then checked each product’s listed features against the eye cosmetic safety guidance cited in this post, including the FDA’s advice to keep tools used near the eye clean.
These are research-based picks, not hands-on lab tests. We did not use these brushes ourselves, so rankings reflect listing detail, brush shapes and who each pick suits rather than personal results. We excluded full face and eye sets where most brushes were for foundation or powder, and removed near-identical listings.
- Strong ratings from a large number of shoppers
- Established brands and fuller-featured sets preferred
- Listed features checked against the cited eye safety guidance
- Products with thin or unclear listings excluded or ranked lower
- No more than two products per brand
Eyeshadow Brush Types and What Each One Does
Eyeshadow brushes differ in three ways: shape, density and size. This table shows the five types most people actually use and where each fits.
| Brush | Shape and density | Main job | Where to use it |
|---|---|---|---|
| Shader or flat brush | Flat, dense, rounded tip | Packs colour with full intensity | All over the lid |
| Blending brush | Fluffy, loose, domed or tapered | Softens edges and blends colours | Crease and outer edges |
| Crease brush | Tapered, medium density | Places deeper shade in the socket | Crease and outer V |
| Pencil brush | Small, dense, pointed | Precise detail and smudging | Lower lash line, inner corner |
| Smudge brush | Short, stiff, rounded | Smokes out liner and dark shadow | Upper and lower lash lines |
| Angled brush | Thin, firm, slanted | Shadow liner and brow powder | Along the lashes, brows |
You do not need every brush. If you mostly wear one or two neutral shades, a shader and a blending brush are enough. If you enjoy smoky or defined looks, a pencil and smudge brush make the biggest difference.
Choosing the Right Size for Your Eye Shape
Brush size should match the space on your lid. A blending brush that is too large drags colour up to the brow bone, while one that is too small makes blending slow and streaky.
- Small or hooded lids: choose smaller, more tapered blending and crease brushes to keep colour where it shows.
- Deep-set eyes: a medium tapered brush places shade just above the crease without darkening the socket too much.
- Large or wide lids: a larger, fluffy blending brush speeds up diffusing colour across more space.
- Monolids: a flat shader and a soft blending brush let you build a gradient upward from the lash line.
- Mature lids: soft, dense brushes press colour onto crepey skin without tugging.
Our guide to blending eyeshadow on hooded lids shows how brush size and placement change the result when part of the lid is hidden.
Synthetic vs Natural Hair Eyeshadow Brushes
Brush hair affects how much pigment a brush picks up, how smoothly it blends and how easy it is to clean.
| Feature | Synthetic | Natural hair |
|---|---|---|
| Best with | Powder, cream and liquid shadows | Mainly powder shadows |
| Pickup | Even, can be more precise | Picks up and diffuses powder softly |
| Cleaning | Dries quickly, holds its shape | Absorbs water, can shed or lose shape |
| Allergy risk | Low | Can bother people sensitive to animal hair |
| Animal products | None | Yes |
| Durability | Usually long-lasting | Long-lasting with gentle care |
Modern synthetic fibres have closed most of the gap with natural hair. For creams, glitters and liquid shadows, synthetic is clearly better because natural hair soaks up product. For soft powder blending, some people still prefer natural hair, but a good fluffy synthetic brush does the job well.
Labels such as vegan, cruelty-free or pro describe the materials or marketing, not the quality. A dense, well-shaped synthetic brush will usually outperform a scratchy natural one, so judge by softness, shape and how well the bristles hold together.
How to Apply Eyeshadow With Brushes Step by Step
This simple routine uses four brushes and works for most everyday and evening looks.
Prime the lid
Apply a thin eyeshadow primer or concealer and let it set so colour grips and does not crease.
Set a transition shade
With the blending brush, sweep a soft shade just above the crease in small back-and-forth movements.
Pack the lid colour
Press the main shade onto the lid with the flat shader, patting rather than sweeping for more intensity.
Add depth
Place a deeper shade in the outer corner and crease with the crease brush, keeping it close to the lashes.
Blend the edges
Go back with a clean blending brush to soften any lines between shades.
Define the lash line
Use the pencil or smudge brush to run shadow along the upper or lower lashes.
Clean up
Tidy fallout and edges with a cotton bud or a little concealer before applying base.
Tap off excess powder before touching the lid, and consider doing eye makeup before foundation. If dark shades drop onto the cheeks, you can wipe them away without ruining your base.
Dark and shimmery shades are the most likely to drop. Our article on avoiding fallout with dark eyeshadow gives more ways to control it.
Brushes for Cream, Glitter and Pressed Pigments
Cream and liquid shadows need different handling from powders.
- Use a synthetic flat or shader brush for cream shadows, patting colour on and blending the edges quickly before it sets.
- Use a small, firm synthetic brush or a fingertip to press glitter and foiled shades onto the lid.
- A slightly damp synthetic shader boosts the intensity of shimmer powders, but check the product allows this.
- Keep separate brushes for creams and powders, or clean between them, because cream residue makes powder patchy.
Clean cream brushes more often, since oily residue holds bacteria and makes the bristles clump.
How to Clean Eyeshadow Brushes
Eye brushes pick up pigment, skin oil and bacteria, and they are used near the delicate tissue around the eyes. Our guide on how often makeup brushes need to be cleaned sets out a full schedule.
- Wet only the bristles in lukewarm water, pointing them downwards.
- Swirl on a gentle, fragrance-free cleanser or mild soap in your palm or on a cleaning mat.
- Rinse until the water runs clear, keeping water away from the metal ferrule and handle.
- Squeeze out water gently and reshape the tip with your fingers.
- Lay flat or hang bristles down to dry so water does not loosen the glue.
- Deep clean at least weekly if you use them daily, more often for cream products or sensitive eyes.
Stop using eye makeup and brushes during an eye infection, and throw away or deep clean any brush used while you had it. Never share eye brushes, and do not use shop testers directly on your eyes. See a doctor if you have eye pain, discharge, swelling or changes in vision.
Between deep cleans, you can wipe brushes on a clean cloth to remove excess colour when switching shades, but this does not replace washing.
When to Replace Eyeshadow Brushes
Good brushes can last for years with care, but replace them when they stop doing their job.
- Bristles shed heavily or feel scratchy on the lid.
- The brush has lost its shape and splays after drying.
- The ferrule is loose or the handle is cracked.
- The brush smells or stays stained even after washing.
Caring for brushes well is the easiest way to make them last. Washing them gently, drying them in the right position and storing them in a clean, dry case or cup once fully dry keeps bristles soft and ferrules tight. Keeping travel brushes in a ventilated pouch rather than a sealed plastic bag also helps them dry and stay fresh.
Building a Starter Eyeshadow Brush Kit
A starter kit should grow with your skills. Buying brushes in stages stops you paying for shapes you never use and helps you learn what each one adds.
- Stage one: a flat shader and a medium fluffy blending brush for simple one or two shade looks.
- Stage two: a small pencil brush for the lower lash line, inner corner highlight and tidy detail.
- Stage three: a tapered crease brush and a short smudge brush for defined, smoky and evening looks.
- Optional: a second clean blending brush, so you can soften edges without adding more colour.
- Optional: an angled brush if you like to use dark shadow as a soft liner.
When comparing brushes, feel the bristles on the back of your hand. They should be soft, spring back into shape and not shed. A brush that scratches your hand will feel worse on the thin skin of the eyelid, and a loose, floppy blending brush will struggle to move pigment where you want it.
Dos and Don’ts
Helps
- Start with a shader, blender and pencil brush
- Match brush size to your lid
- Tap off excess powder
- Clean eye brushes regularly
- Dry brushes flat or bristles down
Backfires
- Buy a huge set you will not use
- Use a cream brush for powder without cleaning it
- Share eye brushes
- Use brushes during an eye infection
- Soak the handle and ferrule in water
Honest Limits
A better brush makes blending easier, but it cannot fix a shadow with poor pigment or poor adhesion, or stop creasing on oily lids without a primer. Price is also a weak guide: many affordable synthetic brushes perform well, and some costly ones do not suit every eye shape.
Technique matters more than the number of brushes you own. Two or three well-chosen brushes used with light pressure and patience usually give a better result than a large set used in a hurry.
When to See a Doctor or Dermatologist
- Your eyelids itch, swell or become red and flaky after wearing eye makeup.
- You notice eye pain, discharge, crusting or blurred vision.
- A stye or lump keeps coming back on the lid.
- You react to many eye products and want to find the cause.
This article is for general information and does not replace professional medical advice. Stop using any product that irritates your eyes and see a doctor, optometrist or board-certified dermatologist for eye or eyelid problems.
FAQ
What eyeshadow brushes do I really need?
A flat shader, a fluffy blending brush and a small pencil brush cover most looks.
What is the best brush for blending eyeshadow?
A soft, fluffy, tapered blending brush.
Are synthetic eyeshadow brushes better?
They suit creams and powders, clean easily and contain no animal hair.
Which eyeshadow brush is best for hooded eyes?
The Sigma Beauty E45 has a small tapered tip that places colour precisely in limited lid space.
What is a pencil brush used for?
Precise detail, the inner corner and smudging along the lower lashes.
What is a smudge brush?
A short, firm brush for smoking out liner and dark shadow.
How often should I clean eyeshadow brushes?
At least weekly if used daily, and more often for creams.
Is a big eyeshadow brush set worth it?
Only if you use many shapes. The Real Techniques Everyday Eye Essentials covers the basics in eight tools.
What is the best eyeshadow brush for beginners?
The Real Techniques Everyday Eye Essentials set or the Sigma Beauty E25 blending brush are forgiving places to start.
Can dirty brushes cause eye infections?
They can carry bacteria, so keep them clean and never share them.
Summing Up
The best eyeshadow brushes are a small set of synthetic shader, blending, crease, pencil and smudge brushes chosen to suit the size of your lids.
Use light pressure, build colour in layers, clean your brushes often and never share them, and you will get smoother results with far fewer tools.
Our top pick: Sigma Beauty E45 Small Tapered Blending Brush
The Sigma Beauty E45 takes the top spot because one small, tapered blending brush handles crease work, soft definition and hooded eyes better than any other single tool here. Choose the Real Techniques Everyday Eye Essentials instead if you are starting from nothing and want a complete eye kit, or the Sigma E25 if you want a larger, rounder brush for fast, soft blending.
Check Price on Amazon
Written by
Registered pharmacist and founder of Facial Adviser. Rakib's pharmacy training covers how skincare actives work and interact; a later course in cosmetology turned that into a focus on facial treatments and skincare products. He plans, researches and edits every guide on the site and checks health claims against sources such as the American Academy of Dermatology, the FDA and the NIH. He is not a dermatologist; see the Editorial Policy and Medical Disclaimer.
About · Editorial policy · How we choose products · Medical disclaimer · Contact
Keep reading: Makeup brushes and tools
- 10 Best Makeup Brush Sets (2026): Soft, Well-Made Kits for Every Look
- 10 Best Body Exfoliating Brushes (2026): Smoother Skin, Gently
- 10 Best Makeup Sponges (2026): Smoother Base, Less Wasted Product
- 10 Best Powder Brushes (2026): Softer Setting, No Cakey Finish
- 10 Best Concealer Brushes (2026): Precise Cover, Seamless Blend
- Best Airbrush Makeup Kit: How They Work, What to Look For and Avoid