10 Best Makeup Sponges (2026): Smoother Base, Less Wasted Product
A makeup sponge is one of the cheapest tools in a makeup bag, yet it changes the finish of foundation, concealer and cream blush more than most people expect. This list covers 10 options, from classic blenders and microfiber sponges to concealer puffs and bulk wedges. The right shape, material and amount of water decide whether your base looks like skin or sits on top of it.
Part of our guide to makeup tools. Start with: 10 Best Makeup Brush Sets (2026): Soft, Well-Made Kits for Every Look
The best makeup sponge for most people is a latex-free, polyurethane foam sponge with a rounded side and a pointed or flat edge, used damp. A damp foam sponge presses liquid and cream products into the skin for a natural, skin-like finish and reaches around the nose and under the eyes. Silicone sponges waste less product but only spread it, so they suit quick, sheer looks. Microfiber-covered sponges give more coverage with a slightly smoother, airbrushed look. Whatever you choose, clean it after every use or at least weekly, let it dry fully, and replace it every one to three months or as soon as it tears, smells or stays stained.
In short: pick a latex-free foam sponge in a shape that fits your face, use it damp and bouncy, and treat it as a disposable tool that needs regular washing.
Hygiene matters as much as the finish. The US Food and Drug Administration advises against sharing cosmetics because another person’s bacteria may be hazardous to you, and a warm, damp sponge that touches many faces or sits wet in a drawer is exactly the kind of tool that makes that risk real.
Below you will find the ten picks, how we chose them, sponge shapes and materials, when to use a sponge damp or dry, and how to clean and replace it.
Shopping these picks?
Amazon Prime members get fast, free shipping on eligible items, plus Prime Video, Amazon Music and member deals. New members can start with a free trial.
Start a free Prime trialAged 18 to 24? Prime for Young Adults comes with a longer free trial and a lower price after it.
Affiliate link: we may earn a commission at no extra cost to you.
As an Amazon Associate we earn from qualifying purchases. This does not change which products we include.


The Short Version
- Beautyblender Original is our top pick: latex-free foam that expands damp and suits liquids, creams and powders.
- JUNO and Co. Microfiber Velvet Sponge gives fuller, smoother coverage thanks to its microfiber layer.
- e.l.f. Total Sponge Set is the most versatile, with shapes for foundation, concealer and contour.
- Foam sponges give the most natural finish when used damp.
- Latex-free sponges are the safest choice for sensitive or allergy-prone skin.
- Bounce or press the sponge; do not drag or wipe it.
- Wash sponges often, dry them in open air and replace them every one to three months.
Contents
- The 10 Best Makeup Sponges Right Now
- How We Chose These Products
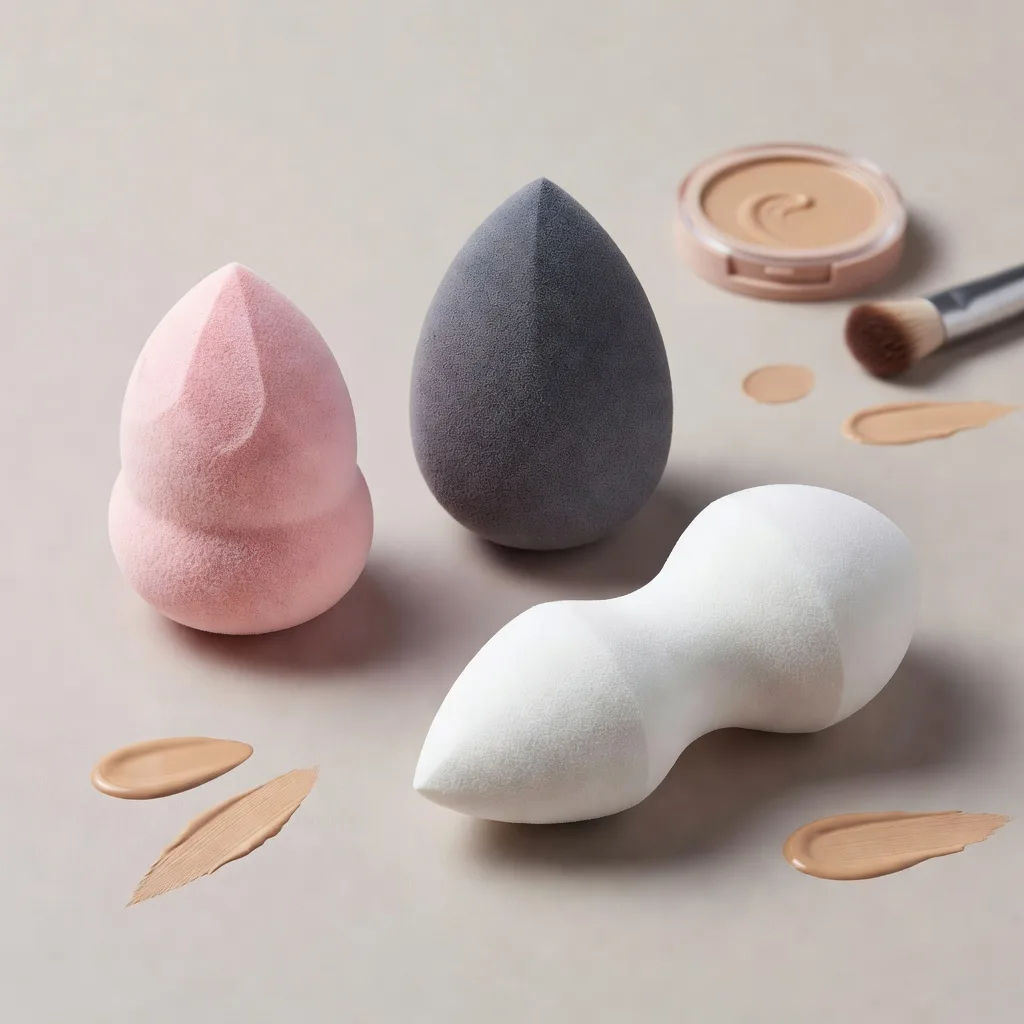
- Makeup Sponge Shapes and What Each Does Best
- Latex-Free, Silicone or Microfiber: Which Material Is Best?
- Damp vs Dry: When to Wet Your Makeup Sponge
- How to Use a Makeup Sponge Step by Step
- How to Choose the Best Sponge for Your Skin and Routine
- How to Clean a Makeup Sponge Properly
- How Often to Replace a Makeup Sponge
- Common Makeup Sponge Mistakes
- Dos and Don’ts
- Honest Limits
- When to See a Dermatologist
- Common Questions
- Where This Leaves You
The 10 Best Makeup Sponges Right Now
These ten sponges were shortlisted from widely reviewed Amazon listings and ranked on material, shape, how clearly each seller explains wet and dry use, and how well each suits different routines. Each pick notes who it suits and who should skip it.
| # | Product | Best For | Standout Feature | |
|---|---|---|---|---|
| 1 | Beautyblender Original Makeup Sponge | Natural-finish liquid and cream bases | Latex-free foam that expands when damp | View |
| 2 | JUNO and Co. Microfiber Velvet Sponge | Fuller, airbrushed-looking coverage | Microfiber layer over a foam blender | View |
| 3 | e.l.f. Total Sponge Set | Foundation, concealer and contour in one set | Several shapes, including a contour pyramid | View |
| 4 | Real Techniques Mini Miracle Concealer Puff 6 Pack | Under-eye and spot concealing | Finger-strap mini puffs for precise concealing | View |
| 5 | TecUnite Latex-Free Wedge Sponges, 100 Pack | Makeup artists and one-use hygiene | 100 latex-free wedges | View |
| 6 | Oceane Latex-Free Makeup Sponge Set of 6 | Rotating clean sponges daily | Six latex-free teardrop blenders | View |
| 7 | BEAKEY Flat Duo Makeup Sponge 6 Pack | Dry application and pressing powder | Flat-sided duo shape, strong when dry | View |
| 8 | COOL-ANGLE Latex-Free Blender Sponges, 5 Pack | Simple daily foundation on a budget | Five latex-free medium blenders | View |
| 9 | BS-MALL Triangle Powder Puff Set, 14 Pieces | Pressing and baking powder | Fourteen triangle puffs | View |
| 10 | Real Techniques Miracle Complexion Sponge Duo | A reliable foundation sponge for less | Widely reviewed classic in a two-pack | View |
Beautyblender Original Makeup Sponge

Best for: Natural-finish liquid and cream bases
The Beautyblender Original remains the benchmark because it does the core job of a sponge well: its latex-free foam swells when damp, becomes softer and is designed to soak up less formula, so more foundation ends up on your skin rather than in the sponge. The egg shape gives a broad base for cheeks and forehead and a point for the nose and under-eyes.
It works with liquids, creams and powders, it is washable, and the brand states it is vegan and cruelty-free. The trade-off is that a single sponge still needs replacing every few months, so it costs more over a year than the multipacks further down. Compared with the #2 JUNO sponge, it gives a sheerer, more skin-like finish.
- Super-soft foam for foundation, powder and cream
- Designed to absorb less product
- Expands when damp for buildable coverage
- Latex-free, washable, vegan and cruelty-free
Pros
- Soft, bouncy finish on liquid bases
- Latex-free for allergy-prone skin
- Works across liquids, creams and powders
Cons
- Single sponge costs more to replace regularly
- Needs thorough washing to stay hygienic
Skip it if: Skip it if you want several sponges to rotate on a tight budget; the BEAKEY or Oceane multipacks suit you better.
Check Price on AmazonJUNO and Co. Microfiber Velvet Sponge

Best for: Fuller, airbrushed-looking coverage
JUNO and Co. wraps a traditional foam blender in a soft, non-abrasive microfiber layer, which our materials section explains tends to give more coverage and a smoother, airbrushed look than bare foam. That makes it a good choice if you like a fuller base without layering several coats of foundation.
Rounded sides cover large areas and the pointed side handles detail, and the brand says it can be used wet or dry, including with loose powder, blush and highlighter. It is latex-free and the listing sensibly advises replacing it every one to three months. Compared with the #1 Beautyblender, the finish is less sheer and the microfiber can hold more pigment between washes.
- Ultra-soft microfiber over a foam core
- Rounded sides plus a pointed tip
- Wet or dry use, including loose powder and blush
- Latex-free, replace every one to three months
Pros
- Fuller coverage from less layering
- Works with powders as well as liquids
- Clear replacement guidance from the seller
Cons
- Microfiber can trap pigment and needs careful washing
- Less sheer than bare foam sponges
Skip it if: Skip it if you prefer a very sheer, skin-like base; the Beautyblender gives a lighter finish.
Check Price on Amazone.l.f. Total Sponge Set

Best for: Foundation, concealer and contour in one set
The e.l.f. Total Sponge Set is the pick for anyone who wants more than one shape. It includes the Total Face Sponge for concealer and foundation and a pyramid-shaped contour sponge, with sizes chosen to reach tricky areas such as the sides of the nose and the corners of the eyes.
Having several shapes lets you keep one sponge for base and another for cream contour or concealer, which also helps hygiene because you are not moving colour from one product to another. The listing gives less detail on the foam itself than the Beautyblender or JUNO pages, so treat it as a practical toolkit rather than the softest single sponge.
- Multi-use set of differently shaped sponges
- Includes a Total Face Sponge for base and concealer
- Includes a pyramid-shaped contour sponge
- Sizes designed for hard-to-reach areas
Pros
- Different shapes for different products
- Good for cream contour and concealer
- Established, widely available brand
Cons
- Less detail on material than the top two picks
- More sponges to wash and dry
Skip it if: Skip it if you only wear foundation and want one simple tool; a single blender like the Beautyblender is enough.
Check Price on AmazonReal Techniques Mini Miracle Concealer Puff 6 Pack

Best for: Under-eye and spot concealing
Real Techniques’ Mini Miracle Concealer Puffs solve a specific problem: getting concealer into small areas without using your fingertip. Each small puff has an elastic band that holds it on your finger, so you can press product under the eyes, around the nose and over spots with more control than a full-size sponge allows.
They are reusable, work damp or dry with liquid and cream concealers, and come in a six-pack, which makes it easy to swap in a clean one often. They are not designed for full-face foundation, so pair them with a larger sponge such as the #1 or #2 pick rather than treating them as a replacement.
- Six mini concealer puffs per pack
- Elastic finger band for control
- Use damp or dry with liquid and cream concealer
- Small shape fits under-eye and nose contours
Pros
- Precise control for concealer
- Six-pack supports frequent swaps
- Keeps fingers out of the product
Cons
- Too small for full-face foundation
- Small puffs are easy to lose
Skip it if: Skip it if you do not wear concealer; a single all-round sponge covers your needs.
Check Price on AmazonTecUnite Latex-Free Wedge Sponges, 100 Pack

Best for: Makeup artists and one-use hygiene
TecUnite’s 100-piece pack of white, latex-free wedges suits anyone who values fresh tools over a signature blender, including makeup artists working on several faces and people prone to breakouts who prefer to start with a clean sponge more often. The wedge shape reaches the sides of the nose, the jaw and under the eyes.
The seller says they can be used wet or dry and washed for reuse, but thin wedges hold up less well to repeated washing than thick blenders like the Beautyblender. They also give a slightly firmer, less bouncy finish. Think of them as affordable, low-commitment sponges rather than a luxury tool.
- 100 latex-free wedge sponges
- Soft, flexible triangular shape
- Use wet or dry
- Washable and reusable
Pros
- Plenty of sponges for frequent swaps
- Latex-free material
- Wedge edges handle detail work
Cons
- Firmer, flatter finish than a bouncy blender
- Thin wedges wear out after repeated washing
Skip it if: Skip it if you want a soft, bouncy finish; a teardrop blender such as the Beautyblender suits you better.
Check Price on AmazonOceane Latex-Free Makeup Sponge Set of 6

Best for: Rotating clean sponges daily
The Oceane set gives you six latex-free teardrop sponges, which fits the advice in this guide to rotate a clean sponge while the others dry. The teardrop shape pairs a pointed tip for the nose and under-eyes with a broad side for the cheeks and forehead, so each sponge works as a full-face blender.
The seller says the sponges can be used wet or dry with liquid and powder and are designed to hold less foundation, and it gives a sensible two-to-three-month lifespan with proper care. Its listing leans on marketing language, but as a way to own several Beautyblender-style sponges for regular replacement, it is good value.
- Six latex-free teardrop sponges
- Pointed tip plus broad blending side
- Wet or dry use with liquid and powder
- Suggested lifespan of two to three months
Pros
- Enough sponges to rotate daily
- Latex-free foam
- Full-face teardrop shape
Cons
- Listing is heavy on marketing claims
- Less established brand than the top picks
Skip it if: Skip it if you only need one sponge and prefer a known brand; the Beautyblender is the safer single buy.
Check Price on AmazonBEAKEY Flat Duo Makeup Sponge 6 Pack

Best for: Dry application and pressing powder
BEAKEY’s Flat Duo sponges stand out because the brand designs them to work well dry as well as damp. A flat side presses powder and cream products along the jaw, chin and cheekbones, while the rounded side blends foundation, and the foam expands when fully wet for a softer, sheerer finish.
The six-pack makes regular replacement easy, and the brand says the sponges hold their shape with reuse. The product name states zero latex, which suits allergy-prone users, though the bullets focus more on shape and softness than on material. Compared with the #6 Oceane set, the flat side gives more control over contour and powder.
- Flat duo shape with a flat and rounded side
- Super-soft, elastic foam
- Designed for dry use as well as damp
- Expands when wet and keeps its shape
Pros
- Flat side good for powder and contour
- Works dry for extra coverage
- Six sponges for rotation
Cons
- Flat shape is less precise under the eyes
- Fewer material details than the top picks
Skip it if: Skip it if you mainly want precise under-eye blending; a teardrop or concealer puff works better.
Check Price on AmazonCOOL-ANGLE Latex-Free Blender Sponges, 5 Pack

Best for: Simple daily foundation on a budget
COOL-ANGLE’s five-pack of medium, latex-free blenders is a straightforward option for people who want an everyday foundation sponge without paying premium prices. The seller says they work wet or dry with liquid foundation and powder and are designed for a natural finish, and a medium size is comfortable in most hands.
The listing is generic compared with the brand pages above and gives few details on foam density, so expect a sponge that does the basics rather than one with distinctive features. Five sponges make it easy to rotate and replace on schedule, which, for hygiene, often matters more than which brand you buy.
- Five medium latex-free blenders
- Use wet or dry
- Works with liquid foundation and powder
- Washable and reusable
Pros
- Latex-free at a budget level
- Comfortable medium size
- Enough sponges to rotate
Cons
- Generic listing with few material details
- No specialist shapes for contour or concealer
Skip it if: Skip it if you want specialist shapes; the e.l.f. set or Real Techniques puffs are more targeted.
Check Price on AmazonBS-MALL Triangle Powder Puff Set, 14 Pieces

Best for: Pressing and baking powder
BS-MALL’s set of fourteen triangle puffs is a different kind of sponge: flat, folded puffs that press loose or pressed powder into the skin, especially under the eyes and around the nose, where triangle points fit neatly. The seller lists them for liquid, cream and powder, but they are most useful for setting.
Its listing gives little detail about materials and does not state latex-free, so people with a latex allergy should look at the latex-free picks above. With fourteen pieces, you can keep a clean puff for each week of powder use. Pair them with a foam blender such as the #1 pick for your base.
- Set of fourteen triangle puffs
- Pointed corners for under-eyes and nose
- Listed for liquid, cream and powder
- Multi-coloured set
Pros
- Good for pressing setting powder
- Many puffs for frequent swaps
- Triangle tips reach small areas
Cons
- Listing does not state latex-free
- Less suited to blending liquid foundation
Skip it if: Skip it if you have a latex allergy or never use powder; choose a clearly latex-free blender instead.
Check Price on AmazonReal Techniques Miracle Complexion Sponge Duo

Best for: A reliable foundation sponge for less
The Real Techniques Miracle Complexion Sponge is one of the most widely reviewed foundation sponges available, and this duo gives you a spare, so one can dry while you use the other. The listing positions it as a sponge for foundation, and it suits people who want a dependable everyday blender rather than a collection of specialist shapes.
It is a sensible lower-cost alternative to the #1 Beautyblender for everyday bases, from the same brand as the concealer puffs at #4. Its listing here is short, so we have not assumed extra features, and you should check the pack for allergy labelling if latex is a concern for you.
- Two foundation sponges per pack
- Shaped for foundation application
- Widely available replacement sponges
- From an established makeup-tool brand
Pros
- Widely reviewed classic sponge
- Two-pack allows rotation
- Good lower-cost alternative to the top pick
Cons
- Short listing with few material details
- Only two sponges, so replace on schedule
Skip it if: Skip it if you want many sponges for strict daily swaps; the TecUnite or Oceane packs offer more.
Check Price on AmazonHow We Chose These Products
We shortlisted makeup sponges from Amazon listings that are highly rated by a large number of shoppers, favouring established brands and fuller-featured sponges with clear material, shape and wet or dry guidance. We then checked each product’s listed features against the hygiene and allergy guidance cited in this post, including the FDA’s advice not to share cosmetics.
These are research-based picks, not hands-on lab tests. We did not apply foundation with these sponges ourselves, so the ranking reflects listing detail, materials and versatility rather than personal results. Two lower-ranked picks have short listings, so we describe them only from what the seller states and do not assume they are latex-free unless the listing says so.
- Strong ratings from a large number of shoppers
- Established brands and fuller-featured sponges preferred
- Materials checked against the cited allergy and hygiene guidance
- Products with thin or unclear listings excluded or ranked lower
- Multipacks favoured where they make regular replacement easier
Makeup Sponge Shapes and What Each Does Best
Shape decides where a sponge can reach and how much product it picks up. Most people only need one all-round shape, plus a small sponge for detail work if they wear concealer.
| Shape | Best for | How to use it |
|---|---|---|
| Teardrop or egg | All-over foundation and concealer | Round base for cheeks and forehead, point for eyes and nose |
| Flat edge or cut side | Contour, highlighter, chin and jaw | Press the flat side along the edge of the face |
| Angled or wedge | Under the eyes, sides of the nose | Tap the thin edge into small corners |
| Mini or pointed | Concealer on blemishes and inner corners | Stipple lightly with the tip |
| Round or dome | Cream blush and quick sheer base | Bounce on the high points of the cheeks |
| Finger or thimble sponge | Setting powder and touch-ups | Wear on a fingertip and press powder in |
If you are unsure, a teardrop sponge with one flat side covers almost every task. Choose a size that fits comfortably in your hand; a very large sponge absorbs more product and can feel clumsy around the eyes, while a very small one makes full-face application slow.
Latex-Free, Silicone or Microfiber: Which Material Is Best?
Material changes how much product the sponge soaks up, how soft it feels and how easy it is to keep clean. Here is how the common options compare.
| Material | Finish | Product use | Cleaning | Good for |
|---|---|---|---|---|
| Latex-free polyurethane foam | Natural, skin-like | Absorbs some product | Needs regular deep washing | Most people, sensitive skin |
| Latex foam (older style) | Natural but firmer | Absorbs some product | Wears out faster | People with no latex sensitivity |
| Silicone | Sheer, can look streaky | Very little wasted | Wipes clean quickly | Travel, quick light base |
| Microfiber-covered foam | Smoother, fuller coverage | Moderate | Fabric can hold residue | Medium coverage, mature skin |
| Hydrophilic or cellulose | Soft, dewy | Absorbs a lot | Dries slowly | Wet application, very light layers |
Latex-free foam is the best starting point because it gives a soft, even finish and avoids a common allergen. Older, firm triangle sponges were often made from latex, so if you react to gloves or balloons, check the label. Silicone sponges do not absorb anything, which is useful for saving expensive formulas, but they behave more like a fingertip than a blender. Microfiber-covered sponges suit anyone who wants a slightly more polished look without switching to a brush.
Labels such as latex-free, antimicrobial or odour-resistant describe the material, not a guarantee of hygiene. Any sponge that stays damp and dirty can grow bacteria and mould, so washing and drying still matter.
Damp vs Dry: When to Wet Your Makeup Sponge
Most foam sponges are designed to be used damp. Water fills the pores of the sponge, so it swells, becomes softer and absorbs less foundation, leaving more on your face. Our guide on whether you are supposed to wet makeup sponges covers the reasons in more detail.
- Use damp for liquid foundation, cream concealer, cream blush and cream contour; this gives a natural, skin-like finish.
- Use dry for more coverage from the same product, or to press setting powder under the eyes.
- Use a slightly damp sponge to melt powder into the skin after setting, which softens a dry or cakey look.
- Silicone sponges are always used dry and wiped clean.
- Microfiber sponges usually work best only lightly damp, so check the maker’s directions.
Squeeze out water in a clean towel until the sponge is damp but not dripping. If water beads on your skin, the sponge is too wet and will dilute and streak your base.
Using a sponge that is too wet is the most common mistake. The foundation separates, coverage drops and the base can look patchy along the jaw. A properly damp sponge should feel springy and cool, not soggy.
How to Use a Makeup Sponge Step by Step
These steps work for liquid and cream bases with a damp foam sponge. Adjust the amount of product for the coverage you want.
Prepare your skin
Apply moisturiser and sunscreen and wait a few minutes so the base does not slide or pill.
Dampen the sponge
Run it under clean water, squeeze it out firmly in a towel and check it has grown slightly in size.
Place the product
Dot foundation on the centre of the face or on the back of your hand rather than straight onto the sponge.
Bounce, do not drag
Press and roll the round side over the skin, working outward from the centre of the face.
Use the tip for detail
Tap the point around the nostrils, under the eyes and along the hairline.
Build in thin layers
Let the first layer settle for a minute, then add a little more only where you need it.
Finish and set
Press a clean part of the sponge over the whole face to blend edges, then set with powder if needed.
If your base still looks like a layer on top of the skin, the issue may be the formula or your prep rather than the sponge. Our article on why makeup does not blend into skin explains other common causes.
How to Choose the Best Sponge for Your Skin and Routine
There is no single best sponge for everyone. Match the sponge to how you wear makeup and to your skin.
- Dry or mature skin: a soft, latex-free foam sponge used damp gives a smoother finish over texture and fine lines.
- Oily skin: a damp foam sponge for application, then a dry sponge or puff to press in powder where you shine.
- Sensitive or allergy-prone skin: choose clearly latex-free sponges and avoid scented ones.
- Acne-prone skin: use a fresh or freshly washed sponge each time and never press over broken spots with a used sponge.
- Minimal makeup: a small round sponge or a silicone sponge for sheer tints.
- Full coverage: a microfiber-covered sponge or a dry foam sponge for more pigment per layer.
Buying a multipack is usually more practical than one sponge. It lets you rotate a clean sponge each day while the others dry, and it makes replacing them on schedule much easier.
How to Clean a Makeup Sponge Properly
Sponges soak up makeup, skin oil, dead skin cells and water, which makes them easy places for bacteria and mould to grow. Our guide on how to sanitise makeup tools covers brushes and other tools too.
- Wet the sponge fully in lukewarm water.
- Work a gentle, fragrance-free cleanser, mild soap or solid tool cleanser into it.
- Squeeze and release repeatedly, rinsing until the water runs clear.
- Press out as much water as possible in a clean towel.
- Dry in open air on a clean surface or a ventilated holder, never in a closed case or bag.
- Clean after every use if you have acne-prone or sensitive skin, and at least once a week otherwise.
Throw a sponge away if it smells musty, shows dark spots, stays stained after washing, tears or crumbles. Mould and bacteria can live deep inside the foam where washing does not reach, and using it on broken skin or near the eyes can lead to irritation or infection.
Do not microwave a sponge to sanitise it unless the maker says this is safe. Heat can damage the foam, and a sponge that is not fully soaked can scorch. Harsh products such as bleach or undiluted alcohol also break down the material and can irritate skin if they are not rinsed out completely.
How Often to Replace a Makeup Sponge
Even with good washing, sponges wear out. Foam becomes denser, loses its bounce and starts to hold more product and more germs.
- Daily use: replace roughly every one to three months.
- Occasional use: replace when it loses bounce or shows wear, and do not keep it for years.
- Straight away: after an eye infection, a skin infection or a bad breakout, or if the sponge was shared.
- Silicone sponges last longer but should be replaced when they scratch, split or stay cloudy.
A simple way to keep track is to write the start date on a sticky note inside your makeup bag. Replacing sponges on a schedule is cheap insurance against breakouts and irritation.
Common Makeup Sponge Mistakes
- Rubbing or wiping instead of bouncing, which moves product around and leaves streaks.
- Using a dripping wet sponge, which dilutes the formula and weakens coverage.
- Pouring foundation straight onto the sponge, where much of it soaks in and is wasted.
- Leaving the sponge wet in a closed bag or case after use.
- Using the same sponge for weeks without washing it.
- Sharing a sponge with friends or using shop testers directly on your face.
Dos and Don’ts
Try This
- Choose latex-free foam if you are unsure
- Use it damp and springy for liquids and creams
- Bounce in thin layers
- Wash it often and dry it in open air
- Replace it every few months
Avoid This
- Drag or wipe it across the skin
- Use it dripping wet
- Store it damp in a closed container
- Share it with anyone
- Keep using a torn, stained or smelly sponge
Honest Limits
A sponge cannot change what a foundation does. It will not make a heavy, matte formula look dewy, stop an oily formula from sliding, or turn the wrong shade into the right one. It also cannot hide dry flakes or texture on its own; good skin preparation matters more.
Claims that a particular sponge shape or material is essential are marketing rather than evidence. Fingers and brushes also give good results, and many people use a combination. Choose the tool you find easy to use and to keep clean.
When to See a Dermatologist
- You get itching, swelling or a rash where a sponge touched your skin, which may point to a latex or product allergy.
- Breakouts continue even though you clean or replace your sponges regularly.
- You notice redness, crusting or pain around the eyes after applying makeup.
- You have persistent irritation or a skin condition such as eczema or rosacea that flares with makeup.
This article is for general information and does not replace professional medical advice. If you think you have an allergy or skin infection, stop using the product and tool and see a doctor or board-certified dermatologist.
Common Questions
What is the best type of makeup sponge?
A latex-free foam sponge with a rounded side and a pointed or flat edge suits most people.
Should I use a makeup sponge wet or dry?
Damp for a natural finish; dry for more coverage or pressing powder.
Is the Beautyblender worth it over cheaper sponges?
It is a reliable latex-free all-rounder, but multipacks like the BEAKEY or Oceane sets make regular replacement easier on a budget.
How often should I wash my makeup sponge?
After every use if possible, and at least once a week.
How often should I replace a makeup sponge?
Every one to three months, or sooner if it tears, stains or smells.
Why does my sponge smell musty?
It is probably growing mould or bacteria; throw it away.
Which sponge is best for concealer under the eyes?
A small shape: the Real Techniques Mini Miracle Concealer Puffs or the pointed tip of the Beautyblender or JUNO sponge.
Which sponge is best for sensitive skin?
One clearly labelled latex-free, such as the Beautyblender, JUNO, TecUnite or COOL-ANGLE sponges, kept clean and replaced often.
Are latex-free sponges better?
They are the safer choice if you have a latex allergy or sensitive skin.
Can a dirty makeup sponge cause acne?
It can add bacteria and oil to the skin and may worsen breakouts.
Where This Leaves You
The best makeup sponge for most people is a latex-free foam sponge in a shape that suits your face, used damp and bounced onto the skin in thin layers.
Choose silicone for quick sheer looks or microfiber for more coverage, wash your sponge often, dry it in open air and replace it every few months to protect your skin.
Our top pick: Beautyblender Original Makeup Sponge
The Beautyblender Original takes the top spot because its latex-free foam expands when damp, is designed to hold less product and handles liquid, cream and powder, which covers most routines with one tool. Choose the JUNO and Co. microfiber sponge instead if you want fuller coverage, or the e.l.f. Total Sponge Set if you want several shapes for concealer and contour.
Check Price on Amazon
Written by
Registered pharmacist and founder of Facial Adviser. Rakib's pharmacy training covers how skincare actives work and interact; a later course in cosmetology turned that into a focus on facial treatments and skincare products. He plans, researches and edits every guide on the site and checks health claims against sources such as the American Academy of Dermatology, the FDA and the NIH. He is not a dermatologist; see the Editorial Policy and Medical Disclaimer.
About · Editorial policy · How we choose products · Medical disclaimer · Contact
Keep reading: Makeup brushes and tools
- 10 Best Powder Brushes (2026): Softer Setting, No Cakey Finish
- 10 Best Concealer Brushes (2026): Precise Cover, Seamless Blend
- Best Airbrush Makeup Kit: How They Work, What to Look For and Avoid
- 10 Best Blush Brushes (2026): A Soft Flush for Powder and Cream
- 10 Best Makeup Brush Sets (2026): Soft, Well-Made Kits for Every Look