10 Best Concealer Brushes (2026): Precise Cover, Seamless Blend
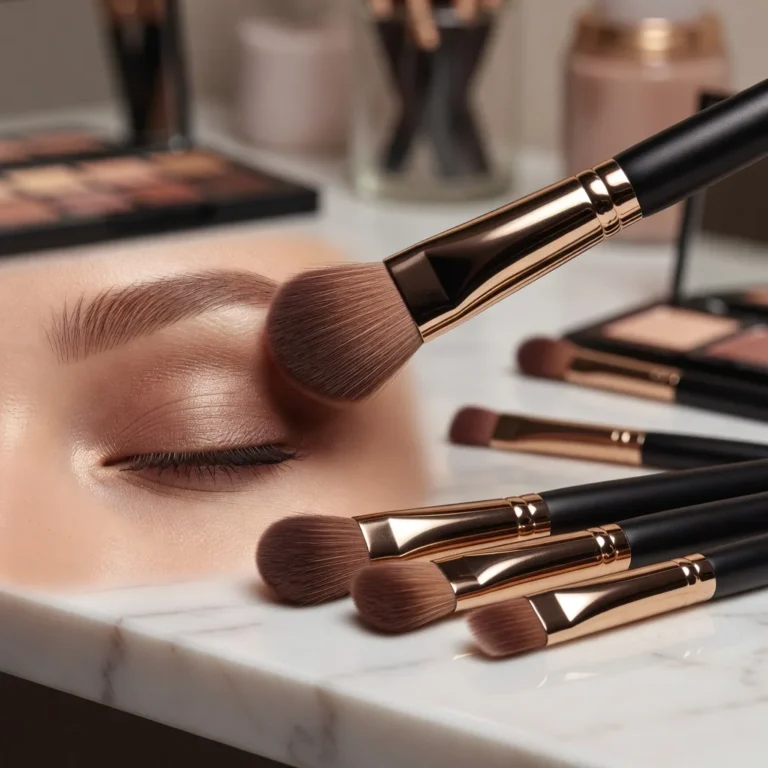
Concealer has to do a precise job on a small area, often on the thinnest skin of the face. A brush puts coverage exactly where it is needed and blends the edge. This list covers 10 options, from flat and angled detail brushes to dual-ended picks, with notes on who each suits.
Part of our guide to makeup tools. Start with: 10 Best Makeup Brush Sets (2026): Soft, Well-Made Kits for Every Look
The best concealer brush for most people is a small, dense synthetic brush, either a slightly tapered paddle for placing product or a small domed buffing brush for blending it in. Synthetic bristles work with liquid and cream concealers and absorb very little product. Use a pointed or flat detail brush to cover individual blemishes, and a soft, fluffy small brush or a gentle tap of a clean fingertip to melt concealer under the eyes. Avoid large, scratchy or natural-hair brushes for liquid concealer, keep a separate or freshly washed brush for blemishes, and clean concealer brushes often.
In short: a small dense synthetic brush places concealer precisely, a soft buffing brush blends it, and clean bristles matter as much as shape.
The US Food and Drug Administration’s guidance on eye cosmetic safety advises washing your hands first, making sure any instrument used near the eye is clean and never sharing cosmetics, because another person’s bacteria may be hazardous to you.
Below you will find the ten picks, how we chose them, concealer brush types compared, which to use where, a step-by-step method and how to clean and store your brushes.
Shopping these picks?
Amazon Prime members get fast, free shipping on eligible items, plus Prime Video, Amazon Music and member deals. New members can start with a free trial.
Start a free Prime trialAged 18 to 24? Prime for Young Adults comes with a longer free trial and a lower price after it.
Affiliate link: we may earn a commission at no extra cost to you.
As an Amazon Associate we earn from qualifying purchases. This does not change which products we include.


Jump to a Section
- The 10 Best Concealer Brushes Right Now
- How We Chose These Products
- Concealer Brush Types Compared
- Which Concealer Brush for Which Concern
- Bristles, Size and Build Quality
- What to Avoid in a Concealer Brush
- How to Apply Concealer With a Brush
- Using a Concealer Brush Under the Eyes
- How to Clean and Store Concealer Brushes
- Brush, Sponge or Fingers?
- Dos and Don’ts
- Honest Limits
- When to See a Dermatologist
- FAQ
- Summing Up
At a Glance
- bareMinerals Maximum Coverage Concealer Brush is our top pick for precise blemish and redness coverage.
- BK Beauty A506 is best under the eyes, with a rounded head designed with mature skin in mind.
- ENZO KEN angled brush suits inner corners and the sides of the nose.
- Small, dense synthetic brushes suit liquid and cream concealer best.
- Tap concealer on in thin layers rather than dragging it.
- Keep blemish brushes separate or clean them after each use.
- Wash concealer brushes at least weekly, and never share them.
The 10 Best Concealer Brushes Right Now
These ten brushes were shortlisted from widely reviewed Amazon listings and ranked by head shape, size, bristle type and how clearly each listing explains its use. Each pick shows who it suits, its trade-offs and who should skip it.
| # | Product | Best For | Standout Feature | |
|---|---|---|---|---|
| 1 | bareMinerals Maximum Coverage Concealer Brush | Covering blemishes and redness precisely | Flat, firm head for targeted coverage | View |
| 2 | BK Beauty A506 Under Eye Concealer Brush | Patting concealer on delicate under-eyes | Rounded kitten paw head for patting | View |
| 3 | ENZO KEN Angled Mini Concealer Brush | Inner corners and the sides of the nose | Dense angled mini head | View |
| 4 | Anastasia Beverly Hills Brush #18 | Precise spots on the eye and face | Precise brush for eye and face | View |
| 5 | Real Techniques Cover and Conceal Dual Brush | Covering and blending with one tool | Two ends for cover and conceal | View |
| 6 | DPOLLA Foundation and Concealer Brush | Doing foundation and concealer together | Foundation and concealer in one purchase | View |
| 7 | Beauty Junkees Mini Flat Top Concealer Brush | Stippling and blending under the eyes | Small, dense flat top for stippling | View |
| 8 | EIGSHOW Dual-Ended Foundation and Concealer Brush | Kabuki base plus angled concealer | Flat top kabuki with an angled end | View |
| 9 | Daubigny Dual-Ended Foundation and Concealer Brush | A compact base and concealer tool | One brush for base and concealer | View |
| 10 | ENERGY Mini Angled Flat Top Concealer Brush | Learning to place and blend concealer | Mini angled flat top for under-eyes | View |
bareMinerals Maximum Coverage Concealer Brush

Best for: Covering blemishes and redness precisely
The bareMinerals Maximum Coverage Concealer Brush takes the top spot because it does one job well. Its flat design is made for covering blemishes, and a flat, firm head lets you press concealer onto a spot or paint it over a patch of redness with control. It comes from a well-established makeup brand and is sold as a single, dedicated brush.
A flat brush places product more than it blends, so tap over the edges afterwards or pair it with a small buffing brush like the #2 BK Beauty for under-eyes. Its listing gives less detail on bristles than some picks, so wash it before first use and keep it separate from your eye-area brush if you use it on breakouts.
- Flat design for covering blemishes
- Firm head for controlled placement
- Dedicated single concealer brush
- Suits liquid and cream concealer
Pros
- Precise coverage on spots
- Clear, single purpose
- Established brand
Cons
- Places more than it blends
- Few listing details on bristles
Skip it if: Skip it if you mainly want to soften dark circles; the #2 BK Beauty is gentler under the eyes.
Check Price on AmazonBK Beauty A506 Under Eye Concealer Brush
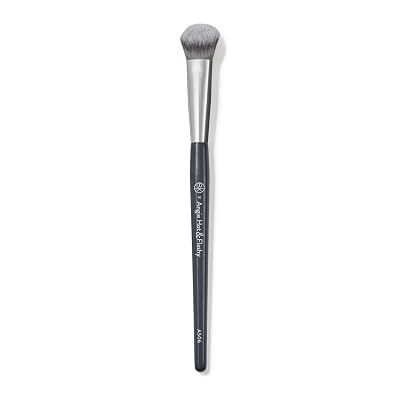
Best for: Patting concealer on delicate under-eyes
The BK Beauty A506 is the pick for under-eye concealer, especially on mature skin. Its listing describes a rounded head for patting and blending, a smaller kitten paw version of the brand’s contoured foundation brush, and says the brand designs its brushes with mature skin in mind. A rounded head is kinder to thin skin than a stiff paddle.
Patting rather than dragging keeps the layer thin, which helps avoid creasing in fine lines. It is softer in approach than the flat #1 bareMinerals brush, so it is less suited to covering a single raised spot. Pair it with a pointed detail brush if you also treat blemishes, and wash it weekly because it sits close to the eyes.
- Rounded head for patting and blending
- Smaller kitten paw shape
- Designed with mature skin in mind
- Made for under-eye concealer
Pros
- Gentle on thin under-eye skin
- Helps avoid creasing
- Blends while placing
Cons
- Less precise on single blemishes
- Paw shape takes practice at the inner corner
Skip it if: Skip it if you mostly cover small spots; the #1 bareMinerals or #4 Anastasia are more precise.
Check Price on AmazonENZO KEN Angled Mini Concealer Brush

Best for: Inner corners and the sides of the nose
The ENZO KEN angled brush suits people who need precision around the inner corner of the eye and the sides of the nose. Its listing describes a small, angled, high-density head of soft synthetic fibres, a birch handle with a non-slip feel and a diamond-shaped aluminium ferrule that the brand says does not shed.
The angle lets you press concealer into tight curves that a round brush misses, and the listing also suggests it for colour correcting. It is smaller than the #1 bareMinerals brush, so covering larger areas takes longer. Compared with the #10 ENERGY brush it has a similar angled shape but more detail about its build and materials.
- Angled, dense mini head
- Soft synthetic fibres
- Birch handle with non-slip grip
- Aluminium ferrule listed as no shedding
Pros
- Reaches tight curves
- Dense head for controlled coverage
- Comfortable grip
Cons
- Slow on larger areas
- Firm feel may be too much for very sensitive skin
Skip it if: Skip it if you want one brush for all-over under-eye blending; the #2 BK Beauty is softer.
Check Price on AmazonAnastasia Beverly Hills Brush #18

Best for: Precise spots on the eye and face
The Anastasia Beverly Hills Brush #18 is sold as a precise conceal brush for the eye and face, according to its title. A precise head suits covering individual blemishes and small marks, or sharpening the edge of brow and lip makeup. It comes from a well-known makeup brand. Its listing gives little detail beyond the title, so we describe it only from that.
A detail brush is best used alongside a softer blending brush rather than on its own, because a small head would take too long on dark circles. Compared with the #1 bareMinerals brush it is designed for finer work. If you use it on active breakouts, wash it before touching the eye area, or keep it for spots only.
- Precise conceal brush
- For eye and face
- Small head for detail
- Suits liquid and cream products
Pros
- Precise on small spots
- Doubles for brow and lip clean-up
- Well-known brand
Cons
- Too small for under-eye blending
- Thin listing detail
Skip it if: Skip it if you want one brush for everything; the #5 Real Techniques dual-ended is more versatile.
Check Price on AmazonReal Techniques Cover and Conceal Dual Brush

Best for: Covering and blending with one tool
The Real Techniques Cover and Conceal brush is a dual-ended, two-in-one brush designed for even coverage, according to its title. Having two ends means one can place product and the other can blend it, which makes it a sensible single brush for people who do not want several. It comes from a widely available brand. Its listing gives little detail beyond the title, so we describe it only from that.
Double-ended brushes are handy for travel, but check that both ends feel firm and well glued when it arrives. It is more versatile than the single-purpose #1 and #4 picks, though each end is a compromise compared with a dedicated brush. Clean both ends, because product can transfer when the brush is stored.
- Dual-ended two-in-one design
- For cover and conceal
- Designed for even coverage
- Compact for travel
Pros
- Place and blend with one tool
- Good for travel
- Widely available brand
Cons
- Each end less specialised
- Thin listing detail
Skip it if: Skip it if you want the gentlest possible under-eye brush; the #2 BK Beauty is made for that.
Check Price on AmazonDPOLLA Foundation and Concealer Brush
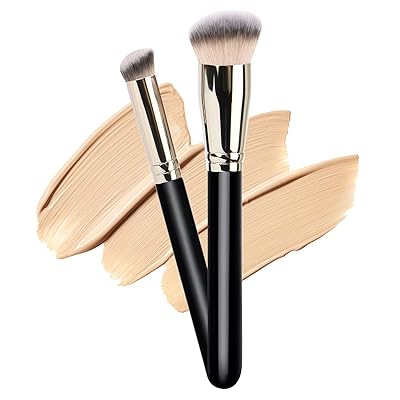
Best for: Doing foundation and concealer together
The DPOLLA product pairs a foundation brush with a concealer brush, according to its title, so it suits people who want to update both tools at once. Using a matching pair helps keep the look consistent, with the larger head for base and the smaller for detail. Its listing gives little detail beyond the title, so we describe it only from that.
It is more of a starter pair than a specialist tool, so it will not match the precision of the #3 ENZO KEN or #4 Anastasia brushes on small spots. Check the bristles for shedding in the first few uses and wash both brushes before first use. It overlaps with the dual-ended #8 EIGSHOW and #9 Daubigny picks.
- Foundation brush
- Concealer brush
- Designed for liquid and cream products
- Pair for a full base routine
Pros
- Covers foundation and concealer
- Simple starter option
- Consistent finish between tools
Cons
- Less specialised than detail brushes
- Thin listing detail
Skip it if: Skip it if you already have a foundation brush; a single concealer brush makes more sense.
Check Price on AmazonBeauty Junkees Mini Flat Top Concealer Brush

Best for: Stippling and blending under the eyes
The Beauty Junkees brush is a mini flat top designed for under-eye concealer, stippling and blending, according to its title. A small, dense flat top presses product into the skin with light taps, which gives good coverage while keeping the layer thin, a helpful combination for dark circles and redness around the nose. Its listing gives little detail beyond the title, so we describe it only from that.
Stippling takes a little longer than painting with a flat paddle like the #1 bareMinerals brush, but it usually looks more like skin. It is a close cousin of the #10 ENERGY brush, which adds an angled edge. Use a light hand, because a dense head can build coverage quickly if you keep adding product.
- Mini flat top head
- Small and dense
- For stippling and blending
- Designed for under-eye concealer
Pros
- Skin-like finish
- Thin, buildable coverage
- Good for redness around the nose
Cons
- Stippling takes time
- Thin listing detail
Skip it if: Skip it if you want to cover single spots precisely; the #4 Anastasia is finer.
Check Price on AmazonEIGSHOW Dual-Ended Foundation and Concealer Brush

Best for: Kabuki base plus angled concealer
The EIGSHOW brush is dual-ended, with a flat top kabuki for foundation and an angled end for concealer, according to its title. That combination suits people who want one tool for buffing in base and then detailing around the nose and eyes, and it keeps the brush kit small. Its listing gives little detail beyond the title, so we describe it only from that.
Compared with the #5 Real Techniques dual brush it leans more towards foundation, thanks to the kabuki end. The angled concealer end is handy for tight curves but less gentle than a rounded paw like the #2 BK Beauty. As with any double-ended brush, clean both ends regularly so foundation and concealer do not build up.
- Dual-ended design
- Flat top kabuki end
- Angled concealer end
- For foundation and concealer
Pros
- Two jobs in one brush
- Kabuki end buffs base well
- Angle reaches tight curves
Cons
- Concealer end less gentle than a paw
- Thin listing detail
Skip it if: Skip it if you only need a concealer brush; a single-purpose pick is simpler.
Check Price on AmazonDaubigny Dual-Ended Foundation and Concealer Brush

Best for: A compact base and concealer tool
The Daubigny brush is dual-ended, with a foundation end and a concealer end, according to its title. One compact brush that covers both steps is useful for travel or a gym bag, where space is short. Its listing gives little detail beyond the title, so we describe it only from that.
It is similar in idea to the #8 EIGSHOW, so choose between them on the shape you prefer once you see the listings. Neither end will be as specialised as a dedicated concealer brush such as the #1 bareMinerals. Pack it only when fully dry, and wash it after trips, because brushes kept in closed bags hold on to moisture.
- Dual-ended design
- Foundation end
- Concealer end
- Compact for travel
Pros
- One brush for two steps
- Easy to pack
- Simple to use
Cons
- Less specialised ends
- Thin listing detail
Skip it if: Skip it if you want precise blemish coverage; the #4 Anastasia or #3 ENZO KEN are finer.
Check Price on AmazonENERGY Mini Angled Flat Top Concealer Brush

Best for: Learning to place and blend concealer
The ENERGY concealer brush is a mini angled flat top kabuki designed for under-eye concealer and nose contouring, according to its title. The combination of a flat top and an angle makes it forgiving for beginners, because you can buff with the flat face and use the edge for tight spots. Its listing gives little detail beyond the title, so we describe it only from that.
It is similar in shape to the #3 ENZO KEN, which gives more detail about its materials, and close to the #7 Beauty Junkees flat top. Start with a very small amount of concealer and tap it in, adding more only where needed. Wash it at least weekly, and keep a separate brush for active spots.
- Mini angled flat top head
- For under-eye concealer
- Also suits nose contouring
- Kabuki-style density
Pros
- Forgiving shape for beginners
- Buffs and details in one head
- Compact size
Cons
- Dense head can over-apply
- Thin listing detail
Skip it if: Skip it if you have very sensitive under-eyes; the #2 BK Beauty paw is softer.
Check Price on AmazonHow We Chose These Products
We shortlisted concealer brushes from Amazon listings that are highly rated by a large number of shoppers, favouring established brands and fuller-featured single brushes over large mixed sets. We then checked each brush’s listed features against the hygiene and eye-safety guidance cited in this post, including the FDA’s advice on clean tools near the eyes and not sharing cosmetics.
These are research-based picks, not hands-on lab tests. We did not use these brushes ourselves, so rankings reflect listing detail, head shape and fit for purpose rather than personal results. Full makeup brush sets were left out, and where a listing gave little detail we described the brush only from its title.
- Strong ratings from a large number of shoppers
- Established brands and fuller-featured models preferred
- Listed features checked against the cited hygiene guidance
- Large mixed brush sets and thin listings excluded
- No more than two brushes from any one brand
Concealer Brush Types Compared
Concealer brushes are small, but their shapes do quite different jobs. This table shows the main types and where each performs best.
| Brush type | Shape and feel | What it does | Best area |
|---|---|---|---|
| Flat paddle | Flat, firm, rounded tip | Paints on even coverage | Under-eyes, redness patches |
| Tapered or pointed | Small, dense, fine tip | Places product on a tiny spot | Single blemishes, marks |
| Small domed buffer | Short, dense, rounded | Buffs concealer into skin seamlessly | Under-eyes, around the nose |
| Angled | Firm, slanted edge | Sharp edges and inner corners | Inner eye corner, brow clean-up |
| Mini flat-top kabuki | Very dense, flat top | High coverage with a skin-like finish | Larger dark areas |
| Soft fluffy small brush | Loose, rounded | Sets concealer with powder lightly | Setting under the eyes |
If you only want one, a small domed buffing brush is the most versatile. It lays down coverage and blends it in one step, and it is gentler on the under-eye area than a stiff paddle. A flat paddle is still useful if you like to paint concealer onto larger patches of redness, because its broad side covers an area quickly, but it can leave faint streaks unless you tap over them afterwards.
Which Concealer Brush for Which Concern
The concern you are covering should shape your choice more than the brush name on the packet.
- Dark circles: a small soft buffing brush or flat paddle, with a thin layer of concealer tapped on rather than dragged.
- Single blemishes: a pointed detail brush to press a dot of concealer onto the spot and feather only the very edge.
- Redness around the nose and chin: a flat paddle or mini kabuki to push product into curves.
- Dark marks and patches: a mini flat-top brush for higher coverage without a thick layer.
- Brightening the inner corners: an angled or small tapered brush for control.
- Colour correcting: a separate small brush for each corrector shade so colours stay clean.
Coverage comes mainly from the concealer, not the brush. A dense brush makes a formula look fuller because it pushes product into the skin, but it will not turn a sheer concealer into full coverage.
Bristles, Size and Build Quality
Concealer is usually a liquid or cream, so bristle choice matters more here than for powder brushes.
| Feature | What to look for | What to avoid |
|---|---|---|
| Bristle material | Smooth synthetic fibres | Natural hair for liquids and creams |
| Density | Dense enough to hold shape | So loose it streaks product |
| Head size | Roughly fingertip width or smaller | Large heads that spread concealer everywhere |
| Tip | Soft, even, slightly rounded or pointed | Frayed or uneven tips |
| Ferrule | Tight, crimped, no wobble | Loose heads that shed or twist |
| Handle | Balanced, easy to grip | Handles that crack or lose their finish when wet |
Synthetic bristles hold their shape after washing and do not soak up expensive concealer. They are also free of animal products, which suits people who avoid them. Handle length is a matter of comfort: shorter handles give closer control for detail work, while longer ones are easier to hold steady at arm’s length from a mirror.
What to Avoid in a Concealer Brush
- Stiff, scratchy bristles that drag the thin skin under the eyes.
- Brushes that are too large to reach the inner corner and sides of the nose.
- Fluffy powder-style brushes used for liquid concealer, which lift product off rather than laying it down.
- Heads that shed, splay or wobble after a few washes.
- Using the same unwashed brush on blemishes and then on clear skin or the eye area.
- Kits bought for the number of brushes rather than the quality of the one or two you will actually use.
A good test in a shop or when your brush arrives is to press it on the back of your hand. It should feel smooth, spring back quickly and leave no loose bristles on your skin. Wash a new brush before its first use to remove any dust or residue from manufacturing and packing.
How to Apply Concealer With a Brush
This method keeps coverage precise and thin enough to avoid creasing.
Prepare the skin
Apply moisturiser or eye cream and let it absorb, then apply foundation if you wear it.
Place small dots
Use the tip of the brush to place a few dots of concealer only where you need coverage.
Tap, do not drag
Press and tap the brush over the dots so product sinks into the skin rather than sliding on top.
Blend the edges
Buff the outer edges softly so they fade into the surrounding skin or foundation.
Treat spots separately
Use a pointed brush to press concealer onto each blemish, blending only the outer rim.
Check and add
Wait a moment, check in daylight and add a second thin layer only where needed.
Set lightly
Dust a very small amount of fine powder with a small fluffy brush if you tend to crease.
Warm liquid concealer on the back of your hand for a few seconds before picking it up with the brush. It spreads more thinly and blends faster, which means you use less.
Using a Concealer Brush Under the Eyes
The skin under the eyes is thin, moves every time you smile and tends to show product more than any other area. A brush should help you use less concealer here, not more.
Keep the layer thin, focus on the darkest inner corner and the shadow along the lower lid, and blend outwards rather than painting a large triangle. Our guide on why concealer creases easily explains the role of product amount and formula, and our article with tips to prevent creasing under the eyes covers prep and setting.
How to Clean and Store Concealer Brushes
Concealer brushes are used on blemishes and close to the eyes, so they need more frequent washing than most brushes. Cream products also leave an oily residue that clumps bristles.
- Wipe excess concealer onto a tissue after each use.
- Wash with a gentle, fragrance-free cleanser at least weekly, or after each use on active breakouts.
- Rinse bristles downwards so water does not enter the ferrule.
- Reshape the tip and dry flat or bristles down.
- Store dry brushes in a clean covered cup or case away from bathroom steam.
- Replace brushes that stay stained, smell or shed after washing.
Do not use a concealer brush on open, weeping or picked spots, cold sores or infected skin and then on the rest of your face or eyes. Wash it first, and stop using eye-area makeup during an eye infection. Never share concealer brushes.
Our guide on how to sanitise makeup tools explains deeper cleaning between regular washes.
Brush, Sponge or Fingers?
Each tool has a place. Brushes give the most control and precise coverage, damp sponges give a soft, skin-like finish and fingers warm cream concealer so it melts into the under-eye area.
Many people use a combination: a pointed brush for spots, and a damp sponge or clean ring finger to blend under the eyes. Whatever you use, clean hands and clean tools are the priority. Sponges hold water and product for longer than brushes, so they need washing and full drying after every few uses, and fingers should always be freshly washed, especially before touching the eye area. If you have sensitive under-eye skin, the softest option that gives you enough control is usually the best one for you.
Dos and Don’ts
Do
- Choose small, dense synthetic brushes
- Tap concealer on in thin layers
- Use a pointed brush for single spots
- Wash concealer brushes often
- Dry brushes flat or bristles down
Don’t
- Drag stiff bristles under the eyes
- Use large fluffy brushes for liquid concealer
- Move from a blemish to the eye area with the same brush
- Share concealer brushes
- Store brushes damp in a closed bag
Honest Limits
A concealer brush improves precision and blending, but it cannot hide raised texture, deep hollows or puffiness. Concealer can make a flat dark mark less visible, while bumps and bags still cast shadows however well the product is applied.
The concealer formula and shade usually matter more than the brush. A shade that is too light or too grey will show whatever tool you use, and a thick, drying formula will crease however skilfully you blend it. Good lighting, a well-matched shade and a light hand make a bigger difference than switching to a new brush.
When to See a Dermatologist
- Your under-eye skin becomes red, itchy or flaky after using concealer.
- Dark circles appear suddenly or come with swelling.
- You rely on concealer to cover persistent acne or dark marks and want to treat them.
- You react to many products and want patch testing.
The FDA notes that some people react to particular ingredients in its information on allergens in cosmetics.
This article is for general information and does not replace professional medical advice. Patch test new products, stop using anything that irritates your skin or eyes, and see a doctor or board-certified dermatologist for persistent problems.
FAQ
What is the best brush for concealer?
A small, dense synthetic brush, either a tapered paddle or a small domed buffer.
Is a flat or fluffy concealer brush better?
Flat brushes place product; small domed brushes blend it more seamlessly.
What brush is best for under-eye concealer?
A small, soft buffing brush used with a tapping motion.
What brush covers blemishes best?
A pointed detail brush that presses concealer onto the spot.
Which concealer brush is best for mature skin?
The BK Beauty A506, whose listing says it is designed with mature skin in mind, used with a gentle patting motion.
Is a dual-ended concealer brush worth it?
Yes for travel or a small kit. The Real Techniques, EIGSHOW and Daubigny picks combine two jobs, though each end is less specialised.
Is the most expensive concealer brush worth it?
Not always. Shape and softness matter more than price, which is why simpler picks like the ENERGY or Beauty Junkees brushes also make the list.
How often should I wash a concealer brush?
At least weekly, and after using it on breakouts.
Is a brush or sponge better for concealer?
A brush gives more precision; a damp sponge gives a softer finish.
Can I share concealer brushes?
No, because they can carry bacteria.
Summing Up
The best concealer brush is a small, dense synthetic brush, with a pointed tip for blemishes and a small domed or paddle head for under-eyes and redness.
Use thin layers, tap rather than drag, avoid scratchy or oversized brushes, keep blemish brushes separate and wash every concealer brush often.
Our top pick: bareMinerals Maximum Coverage Concealer Brush
The bareMinerals Maximum Coverage Concealer Brush takes the top spot because its flat, firm head places concealer exactly where you need it on blemishes and redness, and it comes from an established brand with a single, clear purpose. Choose the BK Beauty A506 instead if under-eye blending on mature or delicate skin is your priority, or the ENZO KEN angled brush if you want a small, dense head for inner corners and the sides of the nose.
Check Price on Amazon
Written by
Registered pharmacist and founder of Facial Adviser. Rakib's pharmacy training covers how skincare actives work and interact; a later course in cosmetology turned that into a focus on facial treatments and skincare products. He plans, researches and edits every guide on the site and checks health claims against sources such as the American Academy of Dermatology, the FDA and the NIH. He is not a dermatologist; see the Editorial Policy and Medical Disclaimer.
About · Editorial policy · How we choose products · Medical disclaimer · Contact
Keep reading: Makeup brushes and tools
- Best Airbrush Makeup Kit: How They Work, What to Look For and Avoid
- 10 Best Blush Brushes (2026): A Soft Flush for Powder and Cream
- 10 Best Makeup Brush Sets (2026): Soft, Well-Made Kits for Every Look
- How to Sanitize Makeup Tools: Brushes, Sponges, Curlers and More
- 10 Best Tools for Base Application (2026): Sponges and Brushes Compared