Why Use a Diffuser for Curly Hair? How It Works, Frizz and Heat Protection
If you have curly or wavy hair, you have probably noticed that a regular blow dry turns defined curls into a cloud of frizz. A diffuser is the attachment designed to solve that problem, and it is one of the simplest tools for drying curls without ruining their shape.
Part of our guide to men's grooming tools. Start with: 10 Best Hair Dryers (2026): Faster Drying With Less Heat Damage
You use a diffuser for curly hair because it spreads the dryer’s airflow over a wide area, so air reaches your hair more gently and evenly instead of as one strong, concentrated jet. That softer airflow dries curls without blowing them apart, which keeps curl clumps intact, reduces frizz and helps curls keep their natural shape and volume. A diffuser also dries hair much faster than air drying, which is useful in cold weather or when time is short. Used on low or medium heat with a heat protectant and without constant movement or touching, it gives many people more defined, bouncier curls than either air drying or a standard nozzle.
In short: a diffuser dries curls gently and evenly, so they stay defined with less frizz.
The American Academy of Dermatology notes that excessive heat can damage hair and advises using lower heat settings, applying a protective product and limiting how often you heat-style.
This guide explains how diffusers work, how to use one without damage, which type to choose and when simply air drying may be the better option for your hair.
Shopping these picks?
Amazon Prime members get fast, free shipping on eligible items, plus Prime Video, Amazon Music and member deals. New members can start with a free trial.
Start a free Prime trialAged 18 to 24? Prime for Young Adults comes with a longer free trial and a lower price after it.
Affiliate link: we may earn a commission at no extra cost to you.
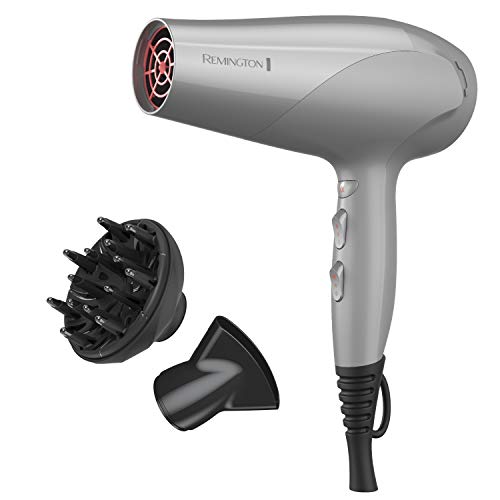
Recommended Hair Dryers With Diffusers and Universal Diffusers on Amazon



At a Glance
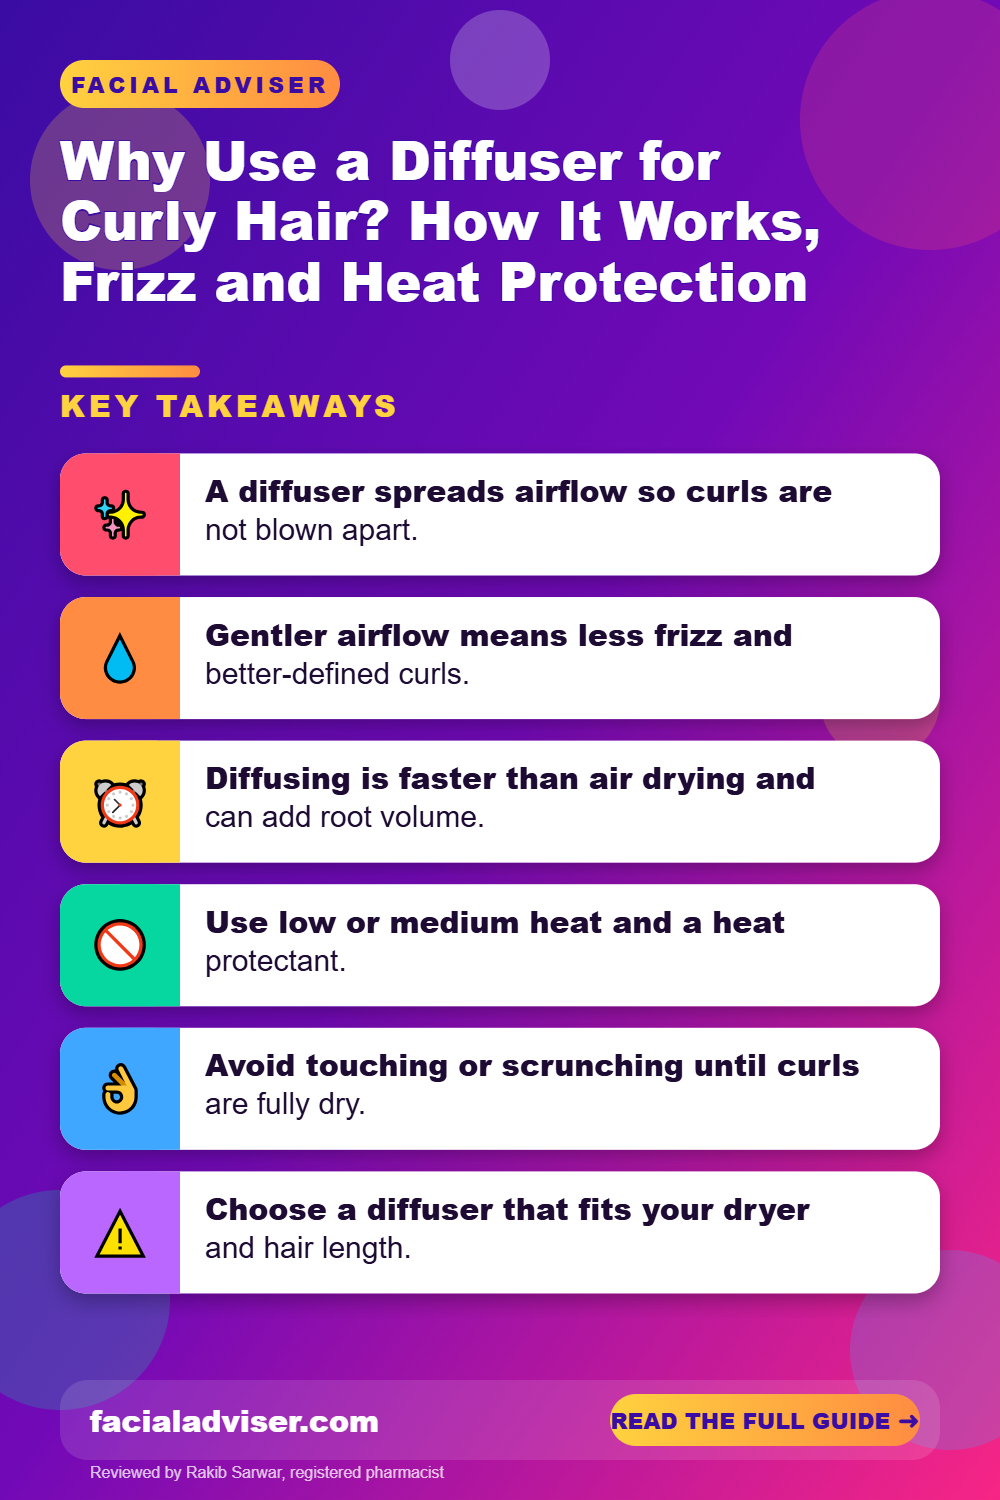
- A diffuser spreads airflow so curls are not blown apart.
- Gentler airflow means less frizz and better-defined curls.
- Diffusing is faster than air drying and can add root volume.
- Use low or medium heat and a heat protectant.
- Avoid touching or scrunching until curls are fully dry.
- Choose a diffuser that fits your dryer and hair length.
- Air drying is still fine and involves no heat at all.
Jump to a Section
- How a Diffuser Works
- Why Diffusing Reduces Frizz
- Diffusing vs Air Drying vs Regular Blow Drying
- Heat Protection and Damage: What to Know
- Preparing Curls Before You Diffuse
- How to Diffuse Curly Hair Step by Step
- Types of Diffuser: Which One to Choose
- Is a Diffuser Right for Your Curl Type?
- Common Diffusing Mistakes
- Diffuser Dos and Don’ts
- Honest Limits of Diffusers
- When to See a Dermatologist
- Frequently Asked Questions
- Final Word
How a Diffuser Works
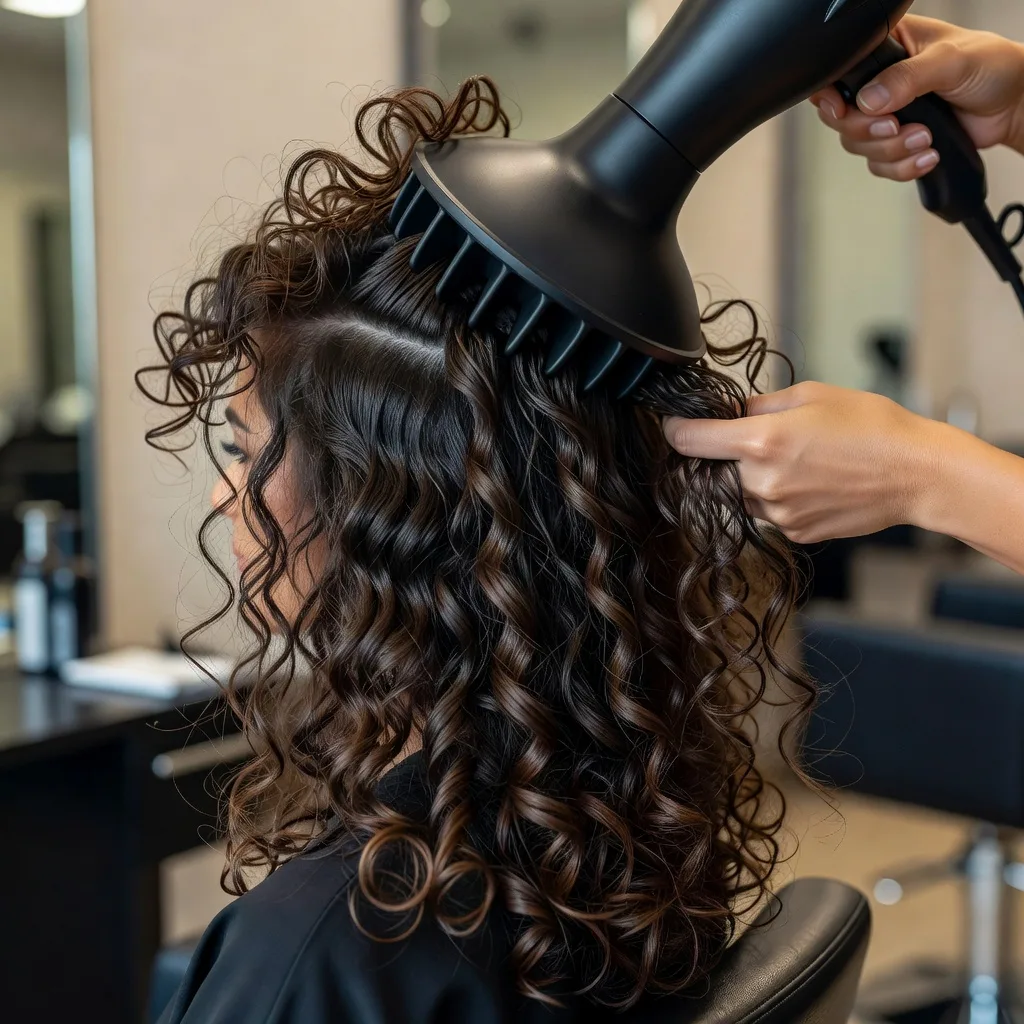
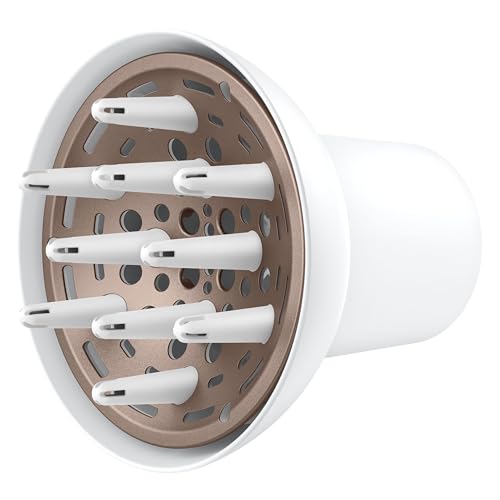
A diffuser is a wide, bowl-shaped attachment with prongs or fingers and many small vents. It fits over the nozzle of a hair dryer and changes how the air leaves it.
- It spreads airflow: the same amount of air comes out over a much wider area, so it hits the hair more softly.
- It reduces speed at any one point: curls are not pushed around or separated into frizz.
- The bowl cups the hair: you can hold curls in place while they dry.
- The prongs lift at the roots: they help create volume without brushing.
A standard concentrator nozzle does the opposite: it narrows the airflow into a fast, focused stream designed for smoothing hair straight with a brush. That is ideal for a sleek blow dry but disruptive for curls.
Why Diffusing Reduces Frizz
Frizz happens when hair strands separate from their curl groups and the cuticle, the outer layer of the hair, is roughed up. Curly hair is particularly prone to this because its shape makes it harder for natural oils to travel down the strand, so it tends to be drier.
A strong, direct jet of air lifts the cuticle and blows curls apart. The gentle airflow from a diffuser lets curls dry in their clumps, while drying reasonably quickly means the hair spends less time exposed to humidity, which can make curls swell and lose shape. Our guide on which humectants work best in humidity explains why some styling ingredients behave differently on humid and dry days.
Diffusing vs Air Drying vs Regular Blow Drying
Each drying method has trade-offs. The best one depends on your hair, your time and how much heat you want to use.
| Method | Curl definition | Frizz | Volume | Heat exposure | Time |
|---|---|---|---|---|---|
| Diffuser | Good to very good | Low if used gently | Good, especially at roots | Low to moderate | Moderate |
| Air drying | Good if left untouched | Low to moderate | Often flatter at roots | None | Slow |
| Nozzle blow dry | Poor for curls | High | Loose and puffy | Moderate to high | Moderate |
| Hood or bonnet dryer | Good | Low | Moderate | Moderate | Moderate to slow |
Air drying avoids heat entirely, but curls that stay wet for hours can stretch under their own weight and lose volume at the roots. Many people combine methods: letting hair air dry partly, then diffusing the last portion to set the shape and add volume.
Heat Protection and Damage: What to Know
Diffusing still uses heat, so it is worth keeping temperatures moderate. Hair that is repeatedly exposed to high heat can become dry, brittle and more likely to break, and curly hair is already prone to dryness.
- Use low or medium heat, and the cool shot button to set curls at the end.
- Apply a leave-in conditioner or heat protectant before drying.
- Keep the diffuser moving slowly between sections rather than holding it in one spot for long.
- Diffuse until hair is mostly dry, then let the last bit air dry if you prefer.
- Limit heat styling on consecutive days where possible.
The AAD’s healthy hair tips recommend reducing how often you use heat styling tools, applying a protective product and choosing lower heat settings, all of which apply to diffusing.
Keep the hot diffuser away from the scalp, ears and face, and never use a hair dryer near water. Unplug it after use and check that the cord and plug are undamaged. If your hair smells burnt or feels hot to the touch, the setting is too high.
Preparing Curls Before You Diffuse
Most of the definition you see after diffusing is decided before the dryer is switched on. The diffuser sets the shape your products and wash routine create, so preparation matters.
- Condition well: curly hair tends to be dry, so a rinse-out conditioner and a leave-in help curls clump and resist frizz.
- Style on soaking wet hair: applying cream or gel while hair is very wet helps curls form and hold together.
- Use a hold product: gel or mousse forms a light cast that protects curls from being disturbed while they dry.
- Blot, do not rub: a microfibre towel or cotton T-shirt removes water without roughing up the cuticle.
- Detangle gently: use fingers or a wide-tooth comb in the shower, not a brush on dry hair.
If you skip styling products, diffusing alone rarely gives lasting definition. Equally, too much heavy product can weigh fine curls down and make drying take much longer, so start with small amounts and adjust. Hair that has been bleached or chemically treated is often more porous and fragile, so it usually benefits from extra conditioning and lower heat when diffusing.
How to Diffuse Curly Hair Step by Step
Technique matters as much as the tool. This method keeps curl clumps together and minimises frizz.
Start with wet, styled hair
Apply leave-in conditioner and your usual styler, such as a curl cream or gel, while hair is soaking wet.
Remove excess water
Gently squeeze with a microfibre towel or cotton T-shirt rather than rubbing.
Set low or medium heat and speed
Low airflow keeps curls from being blown apart.
Cup sections into the diffuser
Place a section of hair into the bowl, lift it towards the scalp and hold for about thirty seconds.
Move slowly around the head
Work section by section, including the roots, without constantly shaking the diffuser.
Finish with a cool shot
Cool air helps set the curls once they are mostly dry.
Scrunch out the crunch
Once fully dry, gently scrunch to break any gel cast for soft curls.
Try hover diffusing first: hold the diffuser a few centimetres away from the hair without touching it until the curls have set a little, then switch to cupping. It is one of the easiest ways to reduce frizz.
Types of Diffuser: Which One to Choose
Diffusers vary in size, shape and fit, and some suit certain curl types better than others.
| Diffuser type | Best for | Things to check |
|---|---|---|
| Deep bowl with long prongs | Long or thick curls, root volume | Can feel bulky on shorter hair |
| Shallow bowl | Short or wavy hair | Less space for long hair |
| Hand or sock-style diffuser | Gentle drying, less frizz | Fit on your dryer nozzle |
| Collapsible silicone diffuser | Travel and small spaces | Heat tolerance of the material |
| Universal attachment | Using your existing dryer | Nozzle diameter compatibility |
| Dryer with matched diffuser | A secure fit and balanced airflow | Weight and heat settings |
A diffuser only works well if it fits securely. Check the nozzle size of your dryer before buying a universal attachment, and choose a dryer with separate heat and speed settings if possible. Our guide to the best hair dryer covers features worth looking for.
Is a Diffuser Right for Your Curl Type?
Most wavy, curly and coily hair can benefit from diffusing, but the approach changes slightly.
- Wavy hair: use low heat and a shallow bowl, and avoid over-scrunching, which can weigh waves down.
- Loose to medium curls: cup and hold sections to encourage defined clumps.
- Tight curls and coils: diffusing can speed up long drying times; use a moisturising styler and low heat.
- Fine hair: keep airflow low and use lighter stylers to avoid limp results.
- Thick hair: diffuse the roots and underneath layers first, where water collects.
Common Diffusing Mistakes
- Using high heat and high speed at once, which causes frizz and dryness.
- Touching, brushing or fluffing curls before they are fully dry.
- Moving the diffuser around constantly, which disturbs curl clumps.
- Skipping leave-in or styler, leaving curls without hold or moisture.
- Diffusing for too long on one area.
If your curls still look frizzy after diffusing, try more product, lower airflow and less handling during the drying process. It can take a few attempts to find the right balance for your hair, so change one thing at a time, such as heat level or amount of gel, to see what makes the difference.
Diffuser Dos and Don’ts
Do
- Use low or medium heat and speed
- Apply a leave-in and heat protectant
- Hover before cupping
- Finish with the cool shot
- Clean the diffuser vents regularly
Don’t
- Blast curls on high heat
- Touch or brush curls while drying
- Hold the diffuser against one spot for long
- Use a dryer with a damaged cord
- Diffuse every day if your hair feels dry and brittle
Honest Limits of Diffusers
A diffuser helps curls dry with shape and volume, but it cannot create curls that are not there or repair damaged hair. Results depend more on your products, technique and hair condition than on the diffuser itself. Some people find air drying gives them just as much definition with no heat at all, and that is a perfectly good choice. Very expensive dryers may offer better airflow control and comfort, but a well-fitting diffuser on a dryer with low settings can work well too. Diffusing will also not stop frizz on a very humid day if hair is dry or damaged; in that case, better conditioning, a stronger hold styler and trimming split ends usually do more than changing your drying tool.
When to See a Dermatologist
See a dermatologist if you notice hair thinning, patches of hair loss, excessive breakage despite gentle care, a sore, itchy or flaky scalp, or burns and blisters from heat styling. These can be signs of scalp conditions or hair damage that need assessment.
This article is general hair care information and not medical advice. Always follow the manufacturer’s safety instructions for electrical appliances, and speak to a healthcare professional about scalp or hair loss concerns.
Frequently Asked Questions
Why use a diffuser for curly hair?
It dries curls gently and evenly, keeping them defined with less frizz.
Is diffusing better than air drying?
It is faster and adds volume, while air drying uses no heat; both can work well.
Does diffusing damage curly hair?
It can if used on high heat often; low heat and protectant reduce the risk.
Should I diffuse on hot or cool?
Low or medium heat, finishing with the cool shot.
How long should I diffuse my hair?
Until it is mostly or fully dry, usually longer for thick or long hair.
Can I use a diffuser on wavy hair?
Yes, with low heat and a light touch.
Should I touch my hair while diffusing?
Avoid it until curls are fully dry to reduce frizz.
Do universal diffusers fit all dryers?
Not all; check the nozzle size and fit.
What is hover diffusing?
Holding the diffuser near but not touching the hair to set curls gently.
Do I need a heat protectant when diffusing?
It is a good idea, as it helps reduce heat damage.
Final Word
You use a diffuser for curly hair because it softens and spreads the dryer’s airflow, letting curls dry in their natural clumps with less frizz and more volume than a standard blow dry, and much faster than air drying.
For the best results, use low heat, a leave-in or heat protectant and a gentle hands-off technique. If your hair becomes dry, brittle or starts to thin, cut back on heat and speak to a dermatologist.

Written by
Registered pharmacist and founder of Facial Adviser. Rakib's pharmacy training covers how skincare actives work and interact; a later course in cosmetology turned that into a focus on facial treatments and skincare products. He plans, researches and edits every guide on the site and checks health claims against sources such as the American Academy of Dermatology, the FDA and the NIH. He is not a dermatologist; see the Editorial Policy and Medical Disclaimer.
About · Editorial policy · How we choose products · Medical disclaimer · Contact
Keep reading: Hair tools
- Drybar The Double Shot Oval Blow-Dryer Brush: Smooth, Frizz-Free Volume?
- 10 Best Hair Curlers (2026): Irons and Wands for Lasting Curls
- 10 Best Hair Straighteners (2026): Smooth Hair, Less Heat Damage
- 10 Best Hair Dryers (2026): Faster Drying With Less Heat Damage
- Can a Beanie Cause Hair Loss? Myths, Friction and What Actually Thins Hair
- 10 Best Safety Razors (2026): Closer, Calmer Shaves for Every Level
- 10 Best Beard Trimmers (2026): Even Lengths, Clean Edges