10 Best Beauty Tool Storage Pouches (2026): Clean, Dry, Travel-Ready
Makeup brushes, sponges, tweezers, eyelash curlers and facial tools spend a lot of time touching your skin, so where they live between uses matters. This list covers 10 options, from large brush-slot cases to compact pouches and silicone holders, and explains which features actually keep tools clean and dry.
Part of our guide to at-home facial devices. Start with: 10 Best Facial Tools (2026): LED, Cleansing, Gua Sha and More
The best beauty tool storage pouch is one that keeps tools separated, protects bristles, lets clean tools breathe and is easy to wipe or wash. For daily use at home, a pouch or roll with individual slots and a breathable or wipeable lining works well. For travel, choose a water-resistant case with a secure zip or cover so bristles stay upright and tools do not touch liquids. The pouch only helps if what goes in is clean and fully dry, so wash brushes and sponges regularly, let them dry before packing, and clean the pouch itself every few weeks.
In short: separate compartments, a wipeable or washable material and only dry, clean tools inside.
The US Food and Drug Administration advises keeping cosmetic containers clean and closed, protecting products from temperature extremes and never sharing makeup, and the same habits apply to the tools you use to apply it.
Below you will find the ten picks, how we chose them, how the different pouch styles compare, how to pack and clean one properly, and when stored tools start to become a hygiene problem.
Shopping these picks?
Amazon Prime members get fast, free shipping on eligible items, plus Prime Video, Amazon Music and member deals. New members can start with a free trial.
Start a free Prime trialAged 18 to 24? Prime for Young Adults comes with a longer free trial and a lower price after it.
Affiliate link: we may earn a commission at no extra cost to you.
As an Amazon Associate we earn from qualifying purchases. This does not change which products we include.


On This Page
- The 10 Best Beauty Tool Storage Pouches Right Now
- How We Chose These Products
- Why Beauty Tool Storage Matters for Hygiene
- Types of Beauty Tool Pouches Compared
- What to Look For in a Storage Pouch
- Keeping Tools Dry Before Storage
- How to Pack and Clean a Beauty Tool Pouch
- Beauty Tool Pouches for Travel
- Where to Keep Your Pouch at Home
- Signs Your Stored Tools Need Attention
- Dos and Don’ts
- Honest Limits
- When to See a Dermatologist
- Common Questions
- Summing Up
In Brief
- Relavel 16.5-Inch Case is our top pick, with covered brush slots, dividers and wipeable fabric.
- gzcz Large Capacity Case is the most customisable, with ten adjustable padded dividers.
- NAONAYA Clear Brush Bag is best for brush-heavy kits, showing every brush at a glance.
- Choose separate slots or a separate compartment so bristles stay in shape and away from liquids.
- Wipeable or washable materials are easiest to keep hygienic.
- Only store tools once they are clean and completely dry, and clean the pouch every few weeks.
- Never share tools, even from a clean pouch.
The 10 Best Beauty Tool Storage Pouches Right Now
These ten pouches and cases were shortlisted from widely reviewed Amazon listings and ranked by how well they protect brushes, how easy they are to wipe clean and how well they travel. Each pick shows who it suits, its trade-offs and who should skip it.
| # | Product | Best For | Standout Feature | |
|---|---|---|---|---|
| 1 | Relavel 16.5-Inch Makeup Train Case | Full brush and tool collections | Covered elastic brush slots plus dividers | View |
| 2 | gzcz Large Capacity Makeup Train Case | Kits that change from trip to trip | Ten adjustable padded dividers | View |
| 3 | NAONAYA Clear Makeup Brush Bag | Brush-heavy kits and makeup artists | Transparent TPU shows every brush | View |
| 4 | HauteHues Upright Brush Holder Makeup Bag | Counter-top use in small bathrooms | Brush holder that stands upright | View |
| 5 | EACHY PU Leather Open-Flat Makeup Bag | Everyday bags and weekend trips | Waterproof brush compartment | View |
| 6 | Abiudeng Double Layer Makeup Bag | Keeping brushes apart from products | Separate upper layer for brushes | View |
| 7 | LAURA GELLER Quilted Makeup Bag with Brush Case | Separating clean brushes from products | Makeup bag plus a separate brush case | View |
| 8 | AGIKET Soft Silicone Makeup Brush Holder | Protecting face brush shape | Soft silicone for face brushes | View |
| 9 | Soimeat Clear Travel Makeup Brush Holder | A few everyday brushes on the go | Slim clear holder with leather trim | View |
| 10 | ANEMEL Travel Makeup Brush Holder Pouch | A simple dust-proof brush pouch | Zipped pouch that keeps dust out | View |
Relavel 16.5-Inch Makeup Train Case

Best for: Full brush and tool collections
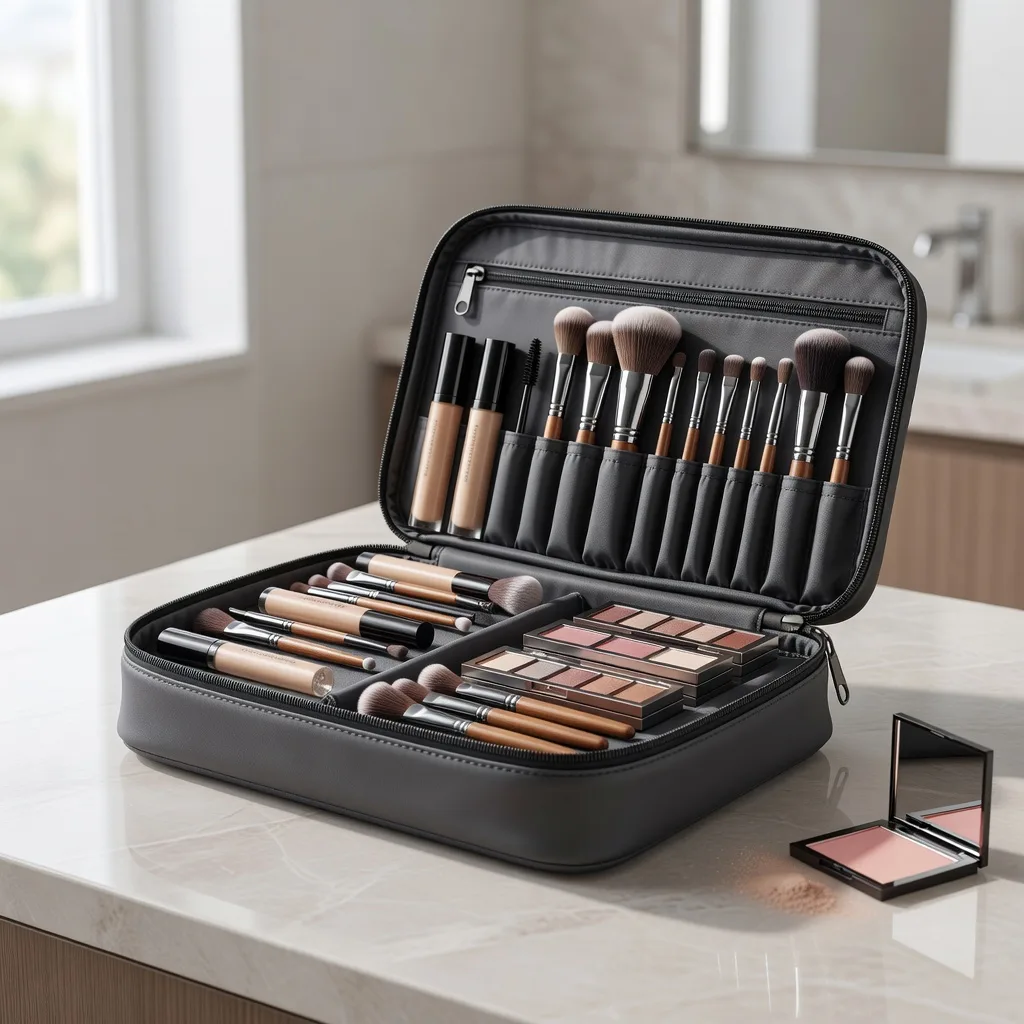
The Relavel case earns the top spot because it treats brushes as seriously as products. A panel of twelve elastic brush slots sits under a plastic cover, which keeps bristles upright and separate from powders and liquids, while adjustable dividers and three zipped mesh pockets hold palettes, sponges and smaller tools.
The oxford fabric is water-resistant and easy to wipe, which matters more for hygiene than any antibacterial claim. A shoulder strap and trolley sleeve make it practical for travel or for carrying a kit to events. The trade-off is size: at over sixteen inches it is far bulkier than the pouches lower down, so it suits a collection rather than a handbag.
- 12 elastic brush slots with a plastic cover
- Adjustable dividers and 3 zipped mesh pockets
- Water-resistant, wipeable oxford fabric
- Shoulder strap and trolley attachment
Pros
- Brushes stay upright and covered
- Separates tools, sponges and products
- Easy to wipe clean
Cons
- Too large for a handbag
- More space than a small everyday kit needs
Skip it if: Skip it if you only carry a few brushes; the ANEMEL or Soimeat holders are far more compact.
Check Price on Amazongzcz Large Capacity Makeup Train Case

Best for: Kits that change from trip to trip
The gzcz case is the most flexible layout on this list, with ten adjustable dividers inside a padded oxford-fabric shell. You can build narrow bays for brushes and tools, larger ones for palettes and bottles, and change the arrangement whenever your kit changes, which suits people who pack differently for work, holidays and events.
Its padding makes it more protective than a soft pouch, and a strap lets you wear it cross-body or slide it onto a trolley handle. Unlike the #1 pick, it has no dedicated covered brush panel, so bristles are protected by the dividers rather than individual slots. It is also large, and the seller pitches it for cameras and jewellery too.
- About 16 x 11 x 5 inches with 10 adjustable dividers
- Padded oxford fabric, described as shockproof and waterproof
- Shoulder or cross-body strap and trolley sleeve
- Also suits jewellery, electronics or a camera
Pros
- Layout adapts to almost any kit
- Padded walls protect fragile tools
- Several carrying options
Cons
- No covered brush slots like the #1 pick
- Bulky for everyday use
Skip it if: Skip it if you want individual brush slots; the Relavel or NAONAYA picks hold brushes more securely.
Check Price on AmazonNAONAYA Clear Makeup Brush Bag

Best for: Brush-heavy kits and makeup artists
NAONAYA’s bag is built around brushes rather than products, which makes it one of the most on-topic picks here. A clear TPU cover lets you see every brush at a glance, so it is easy to spot which ones need washing, and the waterproof material wipes clean quickly after a spill or a dusty trip.
Inside, a main compartment with removable dividers keeps brushes grouped, while a front pocket and two side pockets take sponges, tweezers or spare tools. You can carry it by the handle or with a strap. Clear plastic shows marks more readily than fabric, and it will not hold the full product collection that the #1 and #2 cases can manage.
- Dedicated brush bag with a clear cover
- Main compartment with adjustable dividers
- Front pocket and two side pockets
- Waterproof TPU that wipes clean; handle and strap
Pros
- See at a glance which brushes need washing
- Wipes clean easily
- Keeps brushes grouped and upright
Cons
- Clear plastic shows scuffs and residue
- Less room for products than the train cases
Skip it if: Skip it if you want one bag for products and brushes together; the Relavel case does both.
Check Price on AmazonHauteHues Upright Brush Holder Makeup Bag

Best for: Counter-top use in small bathrooms
The HauteHues bag stands out for its stand-up brush holder, which lets brushes sit upright on a counter while you do your makeup and then zips away for travel. That upright position helps bristles keep their shape and keeps brush heads off damp surfaces, which is exactly the problem in cramped hotel bathrooms.
A wide opening with a double zip shows the whole contents at once, and three compartments separate products from tools. The PU leather surface is waterproof and wipes clean. It is smaller than the top two cases, which makes it a good middle ground, but upright storage only suits brushes that are fully dry before you pack them.
- About 10.6 x 7 x 6.6 inches with 3 compartments
- Wide opening with a double zip
- Stand-up brush holder
- Waterproof PU leather that wipes clean
Pros
- Brushes stand upright on a counter
- Easy to see and reach everything
- Mid-size for travel
Cons
- PU leather can wear at the edges over time
- Holds fewer brushes than the #1 case
Skip it if: Skip it if you want individual covered slots; the Relavel case protects each brush separately.
Check Price on AmazonEACHY PU Leather Open-Flat Makeup Bag

Best for: Everyday bags and weekend trips
EACHY’s bag is a compact, everyday pouch that opens fully and lies flat, so nothing hides in the corners of the bag. Its most useful detail for tool hygiene is a separate waterproof TPU brush compartment, which keeps bristles away from bottles and creams and can be wiped out if something leaks.
The water-resistant PU leather outer is easy to wipe, and the bag doubles as a toiletry bag for short trips. At around nine inches long it is much smaller than the top picks, which makes it ideal for a handbag or carry-on, though longer brushes may not fit. Choose it over the #4 pick if you prefer a flatter, lower-profile shape.
- About 9.3 x 4.1 x 4.3 inches
- Opens fully and lies flat
- Waterproof TPU brush compartment
- Water-resistant PU leather exterior
Pros
- Separate brush section away from liquids
- Lies flat for easy access
- Compact for handbags and carry-on
Cons
- Long brush handles may not fit
- Small for a full collection
Skip it if: Skip it if you carry many long brushes; the NAONAYA or Relavel picks have more room.
Check Price on AmazonAbiudeng Double Layer Makeup Bag

Best for: Keeping brushes apart from products
The Abiudeng bag uses a two-layer design to solve a classic hygiene problem: brushes getting coated in product. The upper layer is reserved for brushes, with a holder to keep them tidy, while the lower layer takes foundation, palettes and skincare, so bristles never sit against a leaking or sticky bottle.
The soft faux leather is waterproof and wipes clean, and a top handle makes it easy to grab. It is compact and light, similar in size to the #5 EACHY pouch but taller, which gives more room for full-size bottles. The trade-off is a smaller brush section than the dedicated brush bags, so it suits a moderate kit rather than a large collection.
- Waterproof soft faux leather
- Upper layer with a brush holder
- Lower layer for full-size products
- Top handle; lightweight for travel
Pros
- Brushes kept away from liquids
- Wipeable surface
- Holds full-size bottles
Cons
- Brush section is modest
- Faux leather may scuff with heavy use
Skip it if: Skip it if you mainly need brush storage; the NAONAYA or AGIKET picks focus on brushes.
Check Price on AmazonLAURA GELLER Quilted Makeup Bag with Brush Case

Best for: Separating clean brushes from products
LAURA GELLER pairs a quilted makeup bag with its own brush case, which is a simple way to follow one of the key hygiene habits in this guide: keep brushes in a separate container from products. The brush case can travel inside the bag or on its own, and the bag doubles as a toiletry organiser.
We only have the listing title for this pick, so check the photos for sizes and linings before buying. Quilted fabric looks smart but can be harder to wipe than coated materials, so a bag like this suits dry products and clean brushes best. It is a more polished, gift-ready option than the plain pouches that follow.
- Quilted makeup bag
- Separate brush case included
- Can be used as a toiletry organiser
- Burgundy colourway
Pros
- Two pieces keep brushes apart from products
- Brush case can travel separately
- Gift-ready look
Cons
- Listing gives limited detail
- Quilted fabric is harder to wipe than TPU
Skip it if: Skip it if you need a wipe-clean surface for liquids; the NAONAYA or EACHY picks are easier to clean.
Check Price on AmazonAGIKET Soft Silicone Makeup Brush Holder

Best for: Protecting face brush shape
Silicone brush holders are the easiest option to keep hygienic, and the AGIKET holder brings that idea to a larger size aimed at face brushes. Silicone can be rinsed and wiped, dries quickly and helps brush heads keep their shape, so it suits anyone who carries a few fluffy powder and blush brushes.
We only have the title for this pick, so check the photos for how many brushes it fits. A silicone holder protects brushes but not the rest of your kit, so it works best inside a larger bag such as the #5 or #6 pick. Only put brushes in once they are fully dry, since silicone does not breathe like mesh.
- Soft silicone brush holder
- Larger size for face brushes
- Portable for travel
- Rinses and wipes clean
Pros
- Very easy to wash
- Helps brush heads keep their shape
- Light and packable
Cons
- Holds brushes only
- Traps moisture if brushes go in damp
Skip it if: Skip it if you want one bag for everything; pair it with a pouch or choose the Relavel case.
Check Price on AmazonSoimeat Clear Travel Makeup Brush Holder

Best for: A few everyday brushes on the go
The Soimeat holder is a slim, clear brush case with leather detailing, designed to carry a handful of everyday brushes in a handbag or toiletry bag. The clear body lets you see what is inside, and a closed holder keeps brushes away from crumbs and lint, one of the main reasons loose brushes get dirty.
Its listing title is brief, so we cannot confirm exact dimensions or the number of brushes it takes. It is lighter and simpler than the #3 NAONAYA bag, which suits a small daily kit rather than a full collection. Wipe the inside regularly, since clear holders can show residue if brushes go in with product on them.
- Clear travel brush holder
- Leather detailing
- Portable size for handbags
- Can double as a small toiletry case
Pros
- Slim and light
- Contents visible at a glance
- Keeps brushes away from bag debris
Cons
- Few details in the listing
- Only fits a small brush kit
Skip it if: Skip it if you carry more than a few brushes; the NAONAYA bag holds far more.
Check Price on AmazonANEMEL Travel Makeup Brush Holder Pouch

Best for: A simple dust-proof brush pouch
The ANEMEL holder is the most basic pick on this list: a black zippered pouch for brushes, described as dust-proof. For anyone whose brushes currently roll loose in a handbag, that alone is a real improvement, keeping bristles away from lint, crumbs and the inside of lipstick lids. It is a sensible first step.
The listing title is short, so check the photos for size and whether it stands up. It lacks the dividers, covered slots and clear panels of the higher picks, and a closed pouch should only hold dry, clean brushes. It is simpler and plainer than the #9 Soimeat holder, but it covers the essentials and makes a handy spare bag for used brushes.
- Black travel brush holder
- Zipper closure
- Designed to keep dust out
- Portable pouch format
Pros
- Simple and compact
- Keeps brushes away from bag debris
- Black fabric hides marks
Cons
- Very brief listing
- No dividers or individual slots
Skip it if: Skip it if you want structured slots or a clear panel; the Relavel or NAONAYA picks fit better.
Check Price on AmazonHow We Chose These Products
We shortlisted pouches and cases from Amazon listings that are highly rated by a large number of shoppers, favouring established brands and fuller-featured designs with brush slots, separate compartments and wipeable materials. We then checked each product’s listed features against the hygiene guidance cited in this post, including the FDA’s advice to keep cosmetics clean and never share them.
These are research-based picks, not hands-on lab tests. Rankings reflect how well each design separates brushes from products, how easy it is to clean and how practical it is to carry, rather than personal results. Very large cosmetics cases without dedicated brush storage were left out, and four picks are described from their titles because their listings gave little else.
- Strong ratings from a large number of shoppers
- Established brands and fuller-featured designs preferred
- Listed features checked against the cited hygiene guidance
- Products with thin or unclear listings excluded or ranked lower
- Near-duplicate models from the same brand removed
Why Beauty Tool Storage Matters for Hygiene
Brushes and sponges collect skin cells, oil, makeup and bacteria every time you use them. Storage cannot sterilise them, but good storage stops clean tools from getting dirty again and keeps damp tools from turning into a place where microbes grow.
- Loose tools pick up dust, crumbs and lint from handbags.
- Bristles pressed flat lose their shape and apply makeup unevenly.
- Damp tools sealed in a closed bag can develop smells and mould.
- Tools rubbing against lipstick or foundation get coated in product.
- Sharp tools such as tweezers and scissors can damage softer items.
A good pouch keeps each tool in its own space and makes it obvious when something needs cleaning. Our guide on how often makeup brushes need to be cleaned gives realistic cleaning schedules for different brushes.
Types of Beauty Tool Pouches Compared
Storage pouches come in several styles. The right one depends on how many tools you carry and whether you mainly need it at home or on the move.
| Style | Best for | Pros | Cons |
|---|---|---|---|
| Brush roll | Brush collections | Individual slots, bristles stay straight | Slower to open and close |
| Zip pouch with slots | Daily handbag use | Compact, keeps tools secure | Can trap moisture if closed damp |
| Stand-up case | Home vanity and travel | Doubles as a holder, protects bristles | Bulkier |
| Silicone sleeves | A few favourite brushes | Wipeable, protect bristle shape | Need a separate bag |
| Mesh pouch | Sponges and quick-dry items | Breathable, easy to see contents | Little protection from crushing |
| Hard case with divider | Frequent travel | Most protection | Heavier, takes space |
Many people use two options: a breathable or open holder at home, where tools can air out, and a closed, protective case for travel. If you only carry a couple of brushes and a mascara, a small zip pouch with slots is usually enough. If you have a full brush collection, a roll or stand-up case keeps bristles in better shape for longer and makes it easier to see what you own.
What to Look For in a Storage Pouch
Beyond looks, a few practical features decide whether a pouch actually keeps your tools in good condition.
- Separate slots or elastic loops for each brush.
- A cover flap or bristle guard so brush heads are not crushed.
- Wipeable lining, such as coated fabric, or a machine-washable outer.
- A reliable zip or magnetic closure for travel.
- A separate compartment or mesh pocket for sponges and damp items.
- Enough depth for your longest brush handle.
- No strong chemical smell when new.
Leather-look and velvet pouches look elegant but are harder to clean. If you use cream or liquid products often, a coated or silicone option is much easier to keep hygienic.
If you store facial tools such as rollers or gua sha stones, give them their own soft slot so they do not chip against metal tweezers or clips. Check that zips and seams feel solid, because cheap stitching tends to split first at the corners, where heavier tools sit, and a broken pouch soon becomes a loose tangle again.
Whatever you choose, group tools by type: face brushes together, eye brushes in their own row, sponges in a breathable pocket, metal tools in a covered pocket and used tools in a spare bag until they are washed. Keeping eye tools apart from everything else matters most.
Keeping Tools Dry Before Storage
Moisture is the main enemy of stored tools. A brush packed damp can smell within days and a sponge sealed wet can grow mould, even inside a good pouch.
- Squeeze sponges out and let them dry in open air before packing.
- Lay washed brushes flat or bristles down so water does not run into the handle.
- Allow brushes to dry fully, often overnight or longer for dense ones.
- Wipe metal tools dry to prevent rust.
- Leave the pouch open for a while after you unpack it.
Wash brushes the night before a trip, not the morning of. Dense foundation brushes and sponges can take many hours to dry fully, and packing them damp is how most travel pouches start to smell.
How to Pack and Clean a Beauty Tool Pouch
Follow these steps to keep both the tools and the pouch in good condition.
Empty the pouch
Take everything out and check for crumbs, powder and spills.
Clean the tools
Wash brushes and sponges with a gentle cleanser and wipe metal tools with rubbing alcohol.
Let everything dry
Air dry tools completely in an open, clean space.
Clean the pouch
Wipe coated linings with mild soapy water or wash fabric pouches according to the label.
Dry the pouch
Leave it open until fully dry inside and out.
Pack by type
Brushes in slots, metal tools in their own pocket and sponges in a separate breathable section.
Close and check
Make sure bristles are upright and nothing is bent before closing.
Our guide on how to sanitise makeup tools explains which cleaning methods suit brushes, sponges and metal tools. A quick weekly wipe of the pouch lining with mild soapy water, plus a fuller wash once a month, is a realistic routine for most people.
Beauty Tool Pouches for Travel
Travel is where a good pouch really earns its place. Bags are squeezed, liquids leak and tools are packed and unpacked in unfamiliar bathrooms.
- Keep liquids in a separate clear bag so a leak does not soak your brushes.
- Choose a case with a stand-up option if hotel counters are cramped.
- Pack a small spare pouch or bag for tools you have used but not yet cleaned.
- Take a travel-size gentle cleanser if you are away for more than a few days.
- Put sharp tools in a covered pocket and check airline rules for scissors.
If you are flying, liquid limits apply to many of the products you use with your tools. Our guide on how much makeup you can take on a plane covers what usually fits in hand luggage.
Where to Keep Your Pouch at Home
Where you leave the pouch matters as much as the pouch itself. Bathrooms are convenient but warm and humid, which is not ideal for tools or products.
| Location | Good or bad | Why |
|---|---|---|
| Bedroom drawer or shelf | Good | Dry and stable temperature |
| Open vanity holder | Good for daily brushes | Tools air out between uses |
| Bathroom counter | Fair | Humidity from showers can slow drying |
| Inside the shower area | Poor | Constant damp and splashes |
| Car or window sill | Poor | Heat and sunlight damage bristles and products |
The FDA advises protecting cosmetics from temperature extremes and keeping containers clean and closed, as outlined in its page on using cosmetics safely.
Signs Your Stored Tools Need Attention
Even well-stored tools reach a point where they should be cleaned or replaced. Check them each time you clean the pouch.
- A musty or sour smell from brushes or sponges.
- Visible spots, stains or discolouration that do not wash out.
- Shedding, splayed or stiff bristles.
- Cracked, sticky or crumbling sponges.
- Rust on tweezers, curlers or clippers.
- A pouch lining that stays stained or smells after washing.
Throw away sponges or brushes that show mould, and replace any tool you used during an eye infection, cold sore or skin infection. Do not share brushes, sponges or eye tools, even with close friends, because they can spread bacteria and viruses.
Dos and Don’ts
Worth Doing
- Store tools clean and fully dry
- Choose separate slots for brushes
- Wash the pouch every few weeks
- Keep sponges in a breathable section
- Replace worn tools
Skip It
- Seal damp brushes in a closed bag
- Keep your pouch in the shower area
- Mix used and clean tools together
- Share brushes or sponges
- Leave the pouch in a hot car
Honest Limits
A storage pouch is a helpful habit, not a hygiene solution on its own. Antibacterial linings and similar claims may reduce odour, but they do not clean the tools inside, and dirty brushes stay dirty no matter how good the pouch is. The main benefits are protection from dust, crushing and spills.
Breakouts and eye irritation have many causes, and storage is only one small part. Regular tool cleaning, removing makeup before bed and choosing products that suit your skin make a much bigger difference than the pouch you buy. Labels such as vegan leather, eco-friendly or premium describe the material or marketing, not hygiene, so judge a pouch by how easy it is to clean and dry. Price is not a reliable guide either, since a simple, wipeable case often outlasts a decorative one.
When to See a Dermatologist
- You keep getting spots in the same areas where you apply makeup with tools.
- Your eyes become red, sore or crusty after using eye brushes or curlers.
- You develop a rash or itching after using a new tool or product.
- A small cut from a tool becomes red, warm or painful.
This article is for general information and does not replace professional medical advice. See a board-certified dermatologist or doctor for persistent breakouts, eye infections or skin reactions.
Common Questions
What is the best way to store makeup brushes?
Clean and dry, bristles up or in separate slots, away from humidity.
Is a brush roll or case better than a pouch?
Cases with covered slots, like the Relavel, protect bristles best; a compact pouch like the EACHY or ANEMEL is quicker for daily use.
Can I store damp brushes in a pouch?
No, dry them fully first to avoid smells and mould.
How often should I clean my makeup pouch?
Every few weeks, or immediately after a spill.
Is a bigger, more expensive makeup case worth it?
Only if you carry a full collection; the Relavel and gzcz cases suit large kits, while the Soimeat or ANEMEL holders are enough for a few brushes.
Where should I store sponges?
In a breathable section, separate from brushes, once dry.
Is it bad to keep makeup tools in the bathroom?
Humidity slows drying, so a bedroom or dry shelf is better.
What pouch is best for travel?
A water-resistant case with a secure closure and separate brush section, such as the Relavel case or the EACHY open-flat pouch.
Do antibacterial pouches keep brushes clean?
No, you still need to wash the tools regularly.
Can I share makeup brushes if I keep them clean?
It is best not to share brushes or sponges at all.
Summing Up
The best beauty tool storage pouch keeps each tool separate, protects bristles and is easy to clean; the Relavel case is our top pick overall, with the NAONAYA clear bag the best choice for brushes alone.
Remember that storage only protects tools that are already clean and dry. Wash brushes and sponges regularly, clean the pouch every few weeks and replace tools once they smell, shed or stain.
Our top pick: Relavel 16.5-Inch Makeup Train Case
The Relavel 16.5-inch case takes the top spot because it combines covered elastic brush slots with adjustable dividers, mesh pockets and a wipeable fabric, so brushes, tools and products each get their own space. Choose the NAONAYA clear brush bag instead if you mainly carry brushes and want to see them at a glance, or the HauteHues bag if you want brushes to stand upright on a counter.
Check Price on Amazon
Written by
Registered pharmacist and founder of Facial Adviser. Rakib's pharmacy training covers how skincare actives work and interact; a later course in cosmetology turned that into a focus on facial treatments and skincare products. He plans, researches and edits every guide on the site and checks health claims against sources such as the American Academy of Dermatology, the FDA and the NIH. He is not a dermatologist; see the Editorial Policy and Medical Disclaimer.
About · Editorial policy · How we choose products · Medical disclaimer · Contact
Keep reading: Cleansing brushes and skin tools
- 10 Best Sonic Facial Cleansing Devices (2026): Gentle, Deeper Clean
- Best Ultrasonic Pore Extractor: How Skin Scrubbers Work and Who They Suit
- 10 Best Body Cleansing Brushes (2026): Gentle Scrubbers for Smooth Skin
- 10 Best Facial Tools (2026): LED, Cleansing, Gua Sha and More
- 10 Best Silicone Facial Brushes (2026): Gentle Sonic and Manual Picks
- 10 Best Gua Sha Facial Tools (2026): Stone and Steel Picks Compared
- 10 Best LED Light Therapy Masks (2026): Clearer Skin, Softer Lines